Router Setup
OPNSense WireGuard Setup Guide
Adding a WireGuard Peer
-
Navigate to the Server Status page, select the WireGuard server you want to connect to and note its Hostname (xx.wg.ivpn.net) with the WireGuard Public Key.
-
In your router’s webUI, navigate to
VPN-WireGuard-Instances-Peerstab, click on the+button and fill in the following configuration:- Enabled - Checked
- Name - give it any name, e.g. WG_Austria
- Public key - the public key of the selected WireGuard server
- Allowed IPs - 0.0.0.0/0, ::/0
- Endpoint address - the hostname of the selected WireGuard server
- Endpoint port - 2049 (available ports can be viewed here)
- Keepalive interval - 25
-
Click
Save.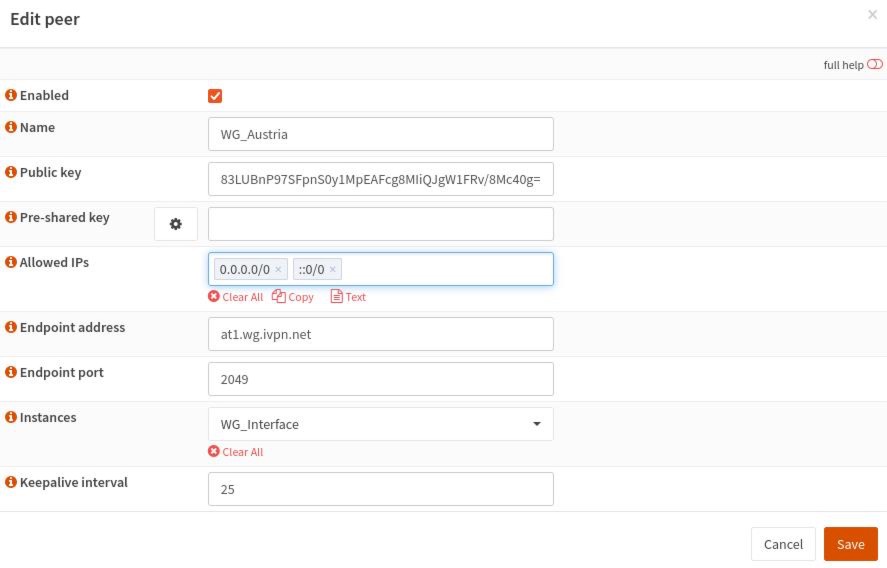
Creating a WireGuard Instance
-
In the
Instancestab, click on the+button. -
Toggle the
Advanced modeswitch on and hit theGearicon next to thePublic keyto generate a new WireGuard keypair. Copy the Public key. -
Log in to your Account area, navigate to the
WireGuardtab, click on theAdd new public keybutton, paste the copied previously key into thePublic keyfield, add any comment and clickAdd. -
Enter the assigned IPv4 and IPv6 IP addresses into your router’s WireGuard instance
Tunnel addressfield and fill in the following fields:- Enabled - Checked
- Name - give it any name, e.g. WG_Interface
- Listen port - 51820
- MTU - 1412
- DNS servers - enter the WireGuard regular DNS server IP address (172.16.0.1) or the one associated with the preferred AntiTracker list
- Peers - select created previously WireGuard Peer
-
Click
Save. -
Have the
Enable WireGuardchecked and clickApply.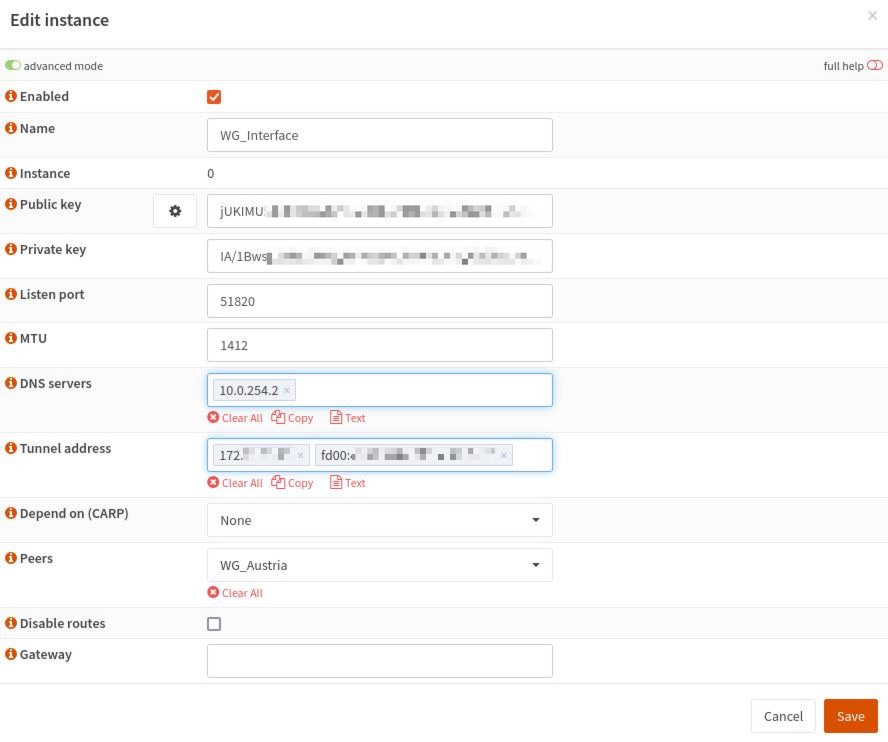
Configuring Interfaces
-
Navigate to
Interfaces-Assignments. -
Add any description to the WireGuard interface, e.g. WG and click
Add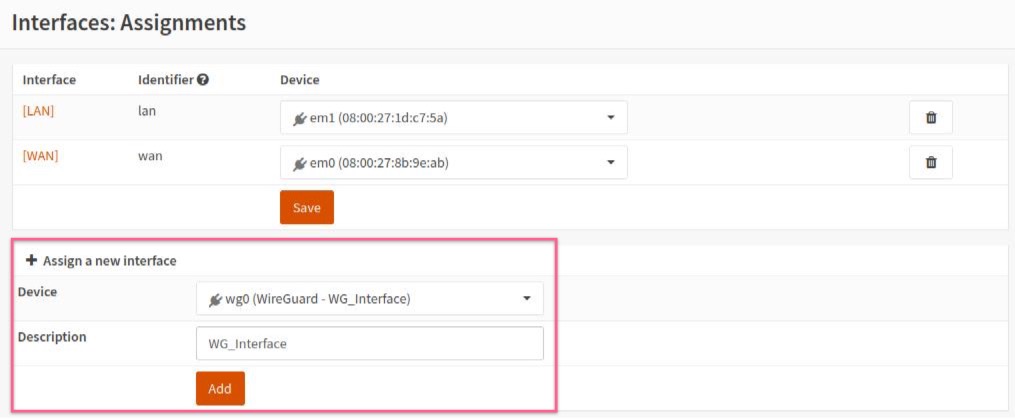
-
Click on the newly added WireGuard interface, check the
Enable Interfacecheckbox and clickSave. -
Click on the
LANinterface, setMSSto1412and clickSave.
Configuring a Firewall
-
Navigate to
Firewall>NAT>Outbound, selectManual outbound NAT rule generationand clickSave -
Click on the
+button to add a new rule and fill in the following configuration:- Disabled - Unchecked
- Interface - select the created earlier interface, i.e. WG
- Source Address - LAN net
- Translation / target - Interface address
-
Delete the other rule(s) containing your local network subnet that exist via WAN. This will ensure that traffic does not leak if the VPN tunnel accidentally goes down.
-
Click
SaveandApply Changes.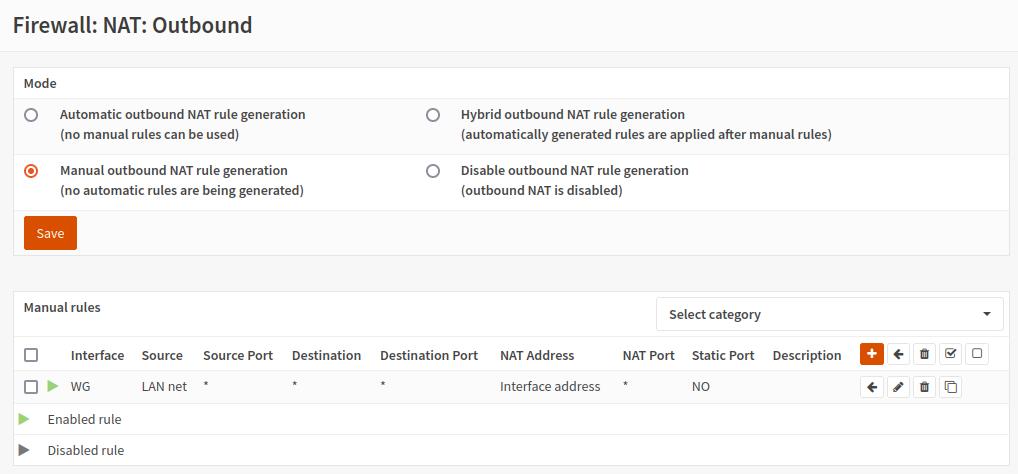
DNS
-
Navigate to
Services>ISC DHCPv4>[LAN] -
In the
DNS serversfield, enter the DNS server IP address specified in the created previously WireGuard Instance. -
Click
Save.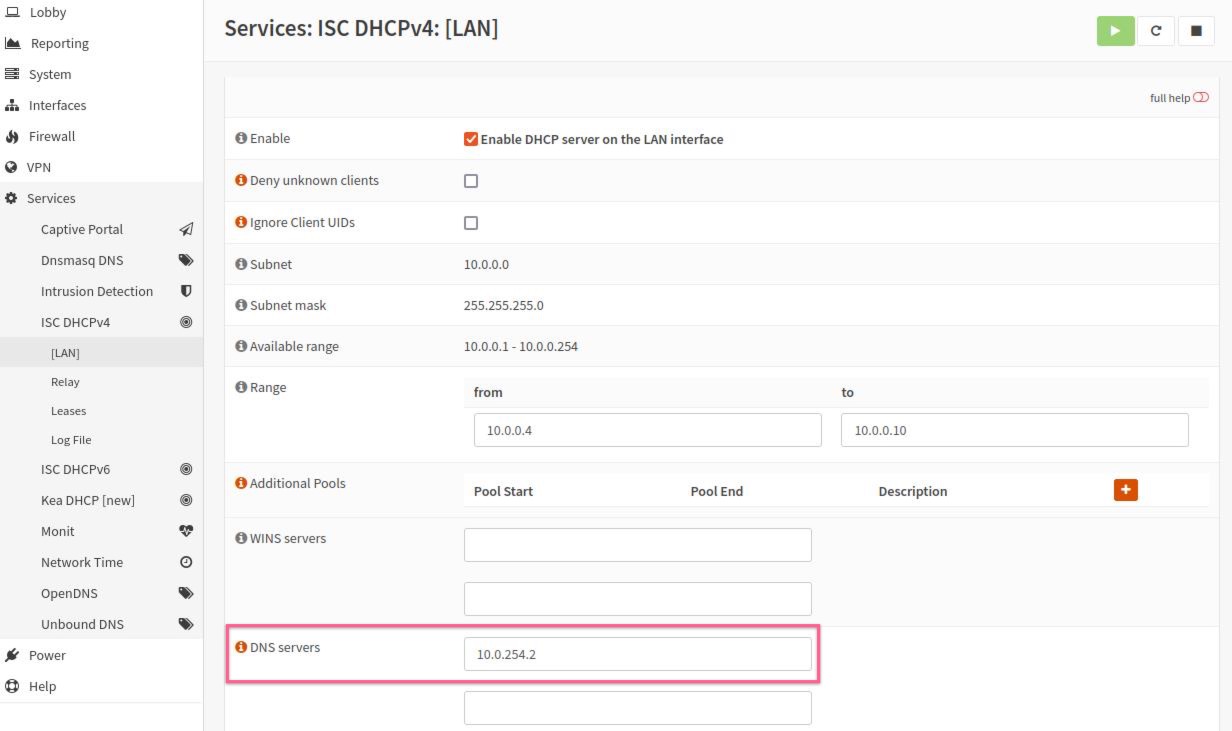
Final Steps
-
Restart your router and check the connection status of the WireGuard client in the
VPN-WireGuard-Statusarea.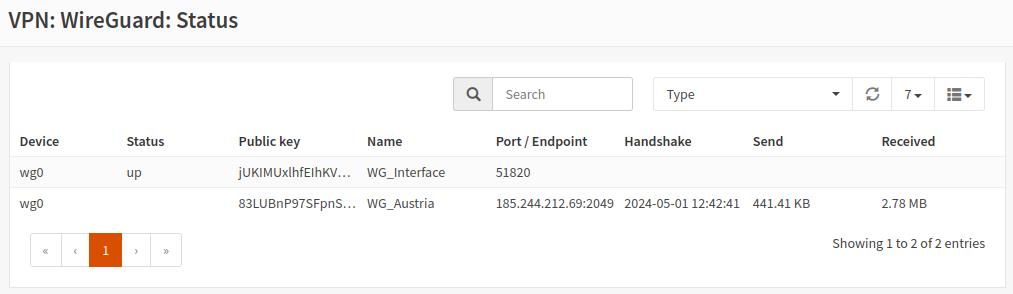
-
Check the conenction status and the assigned public IP address on our website and run a leak test at https://www.dnsleaktest.com from one of the devices connected to your OPNsense router.

Please note: If you plan to use a Multi-hop setup please see this guide and replace the port number in Adding a WireGuard Peer section, Endpoint port field with the chosen Exit-hop server Multi-hop port.