Router Setup
Asuswrt WireGuard Setup Guide
Configuring the VPN tunnel
-
Generate and download the .zip archive containing the WireGuard config file with the selected server and configuration
WireGuard config file generator is only available for accounts that were created after November 2020 (account ID format: i-XXXX-XXXX-XXXX). If you have an IVPN subscription created before this date (account ID format: ivpnXXXXXXXX), and wish to make use of the config file generator, contact our customer service to help you make the switch. -
Extract the archive, launch the web browser and enter the IP address of your router, which is usually
192.168.1.1 -
Once logged in, navigate to
VPN–VPN Fusiontab & click on theAdd profilebutton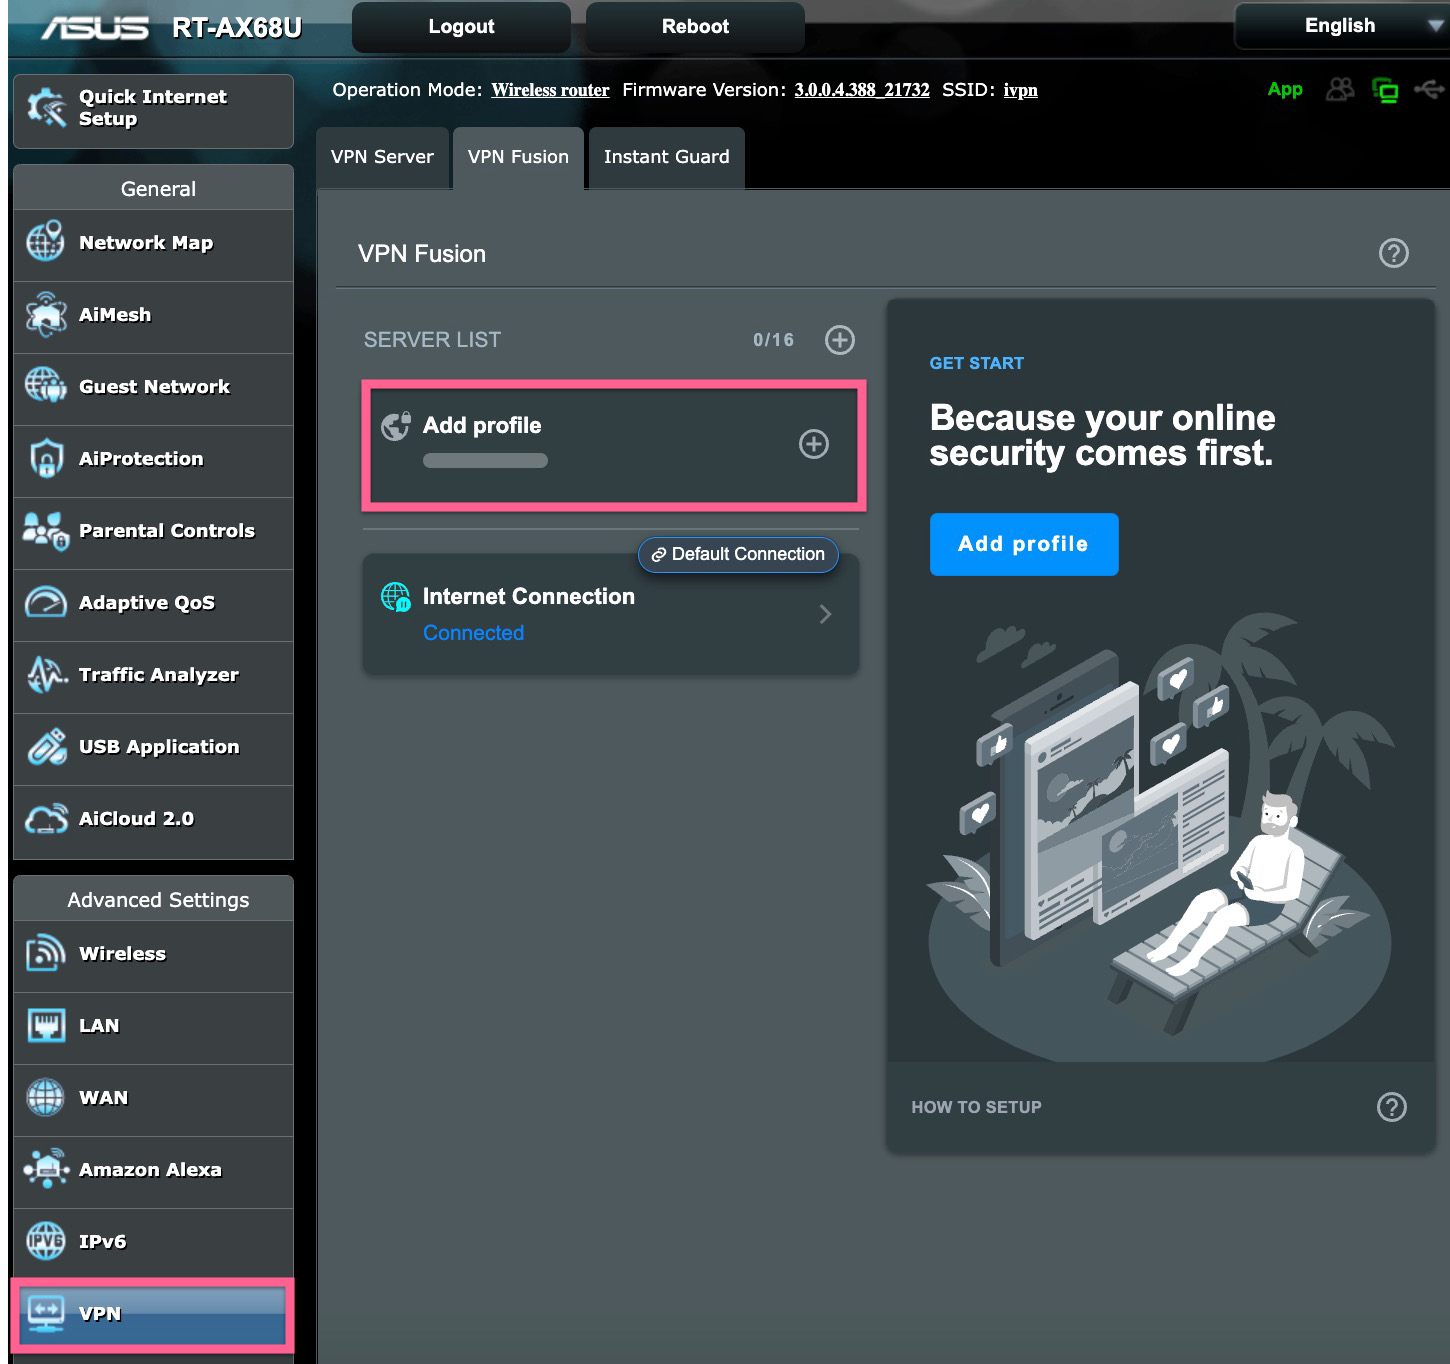
-
Give the profile any name, select
WireGuardfrom the VPN type drop list, click on theUpload Configbutton and import the extracted earlier config file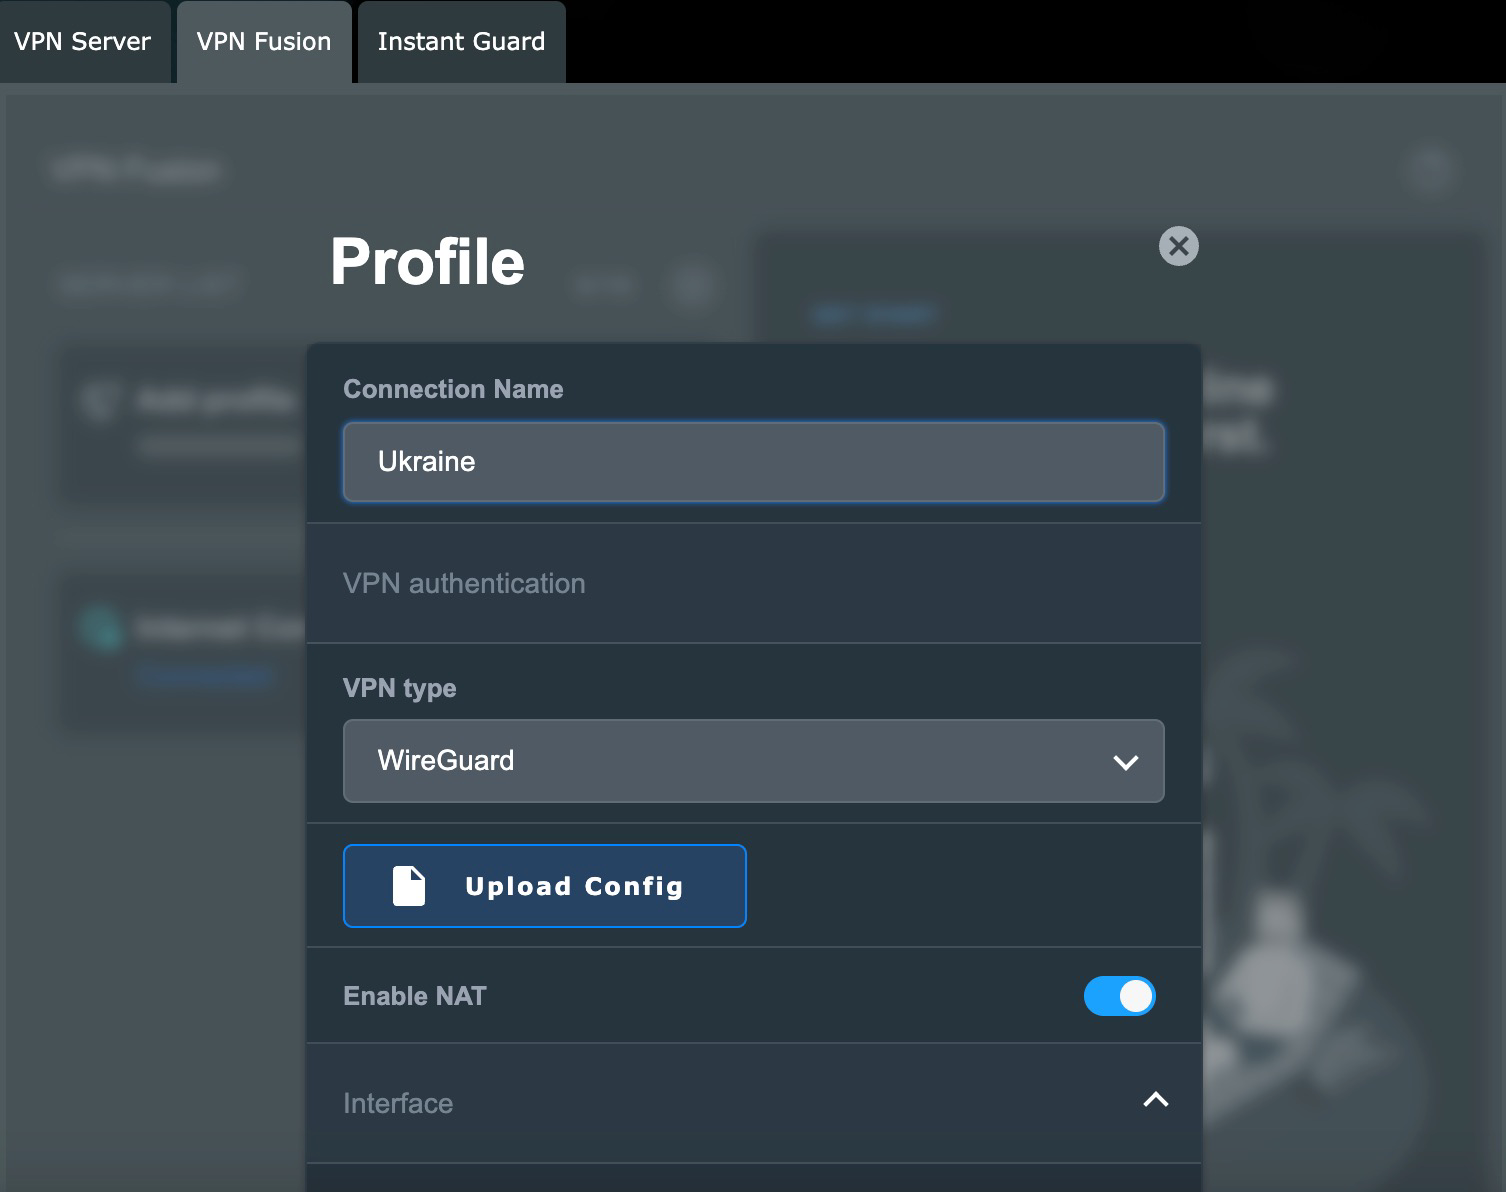
-
Scroll down, remove the extra characters in the
Endpoint Portfield, leaving the port number selected in the config file generator and click on theApply and Enablebutton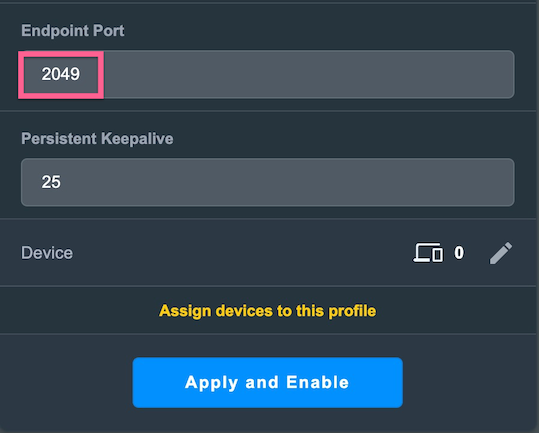
-
To manage the connection, toggle the switch next to the created VPN profile On or Off

Final steps
-
Reboot your router and wait for a minute or two for everything to settle, then reboot your computer system
-
To confirm that you are connected to the IVPN network, check the connection status tool on our website and run a dns leak test at https://www.dnsleaktest.com from any devices connected to your Asus router