Router Setup
Asuswrt-Merlin WireGuard Setup Guide
Configuring the VPN tunnel
-
Generate and download the .zip archive containing the WireGuard config file with the selected server and configuration
WireGuard config file generator is only available for accounts that were created after November 2020 (account ID format: i-XXXX-XXXX-XXXX). If you have an IVPN subscription created before this date (account ID format: ivpnXXXXXXXX), and wish to make use of the config file generator, contact our customer service to help you make the switch. -
Extract the archive, launch the web browser and enter the IP address of your router, which is usually
192.168.1.1 -
Once logged in, navigate to
VPN–VPN Clienttab -WireGuard -
Click on the
Choose filebutton. Select the extracted earlier config file, and hit theUploadbutton -
Put any name into the
Descriptionfield, setEnable WireGuardto Yes, and clickApply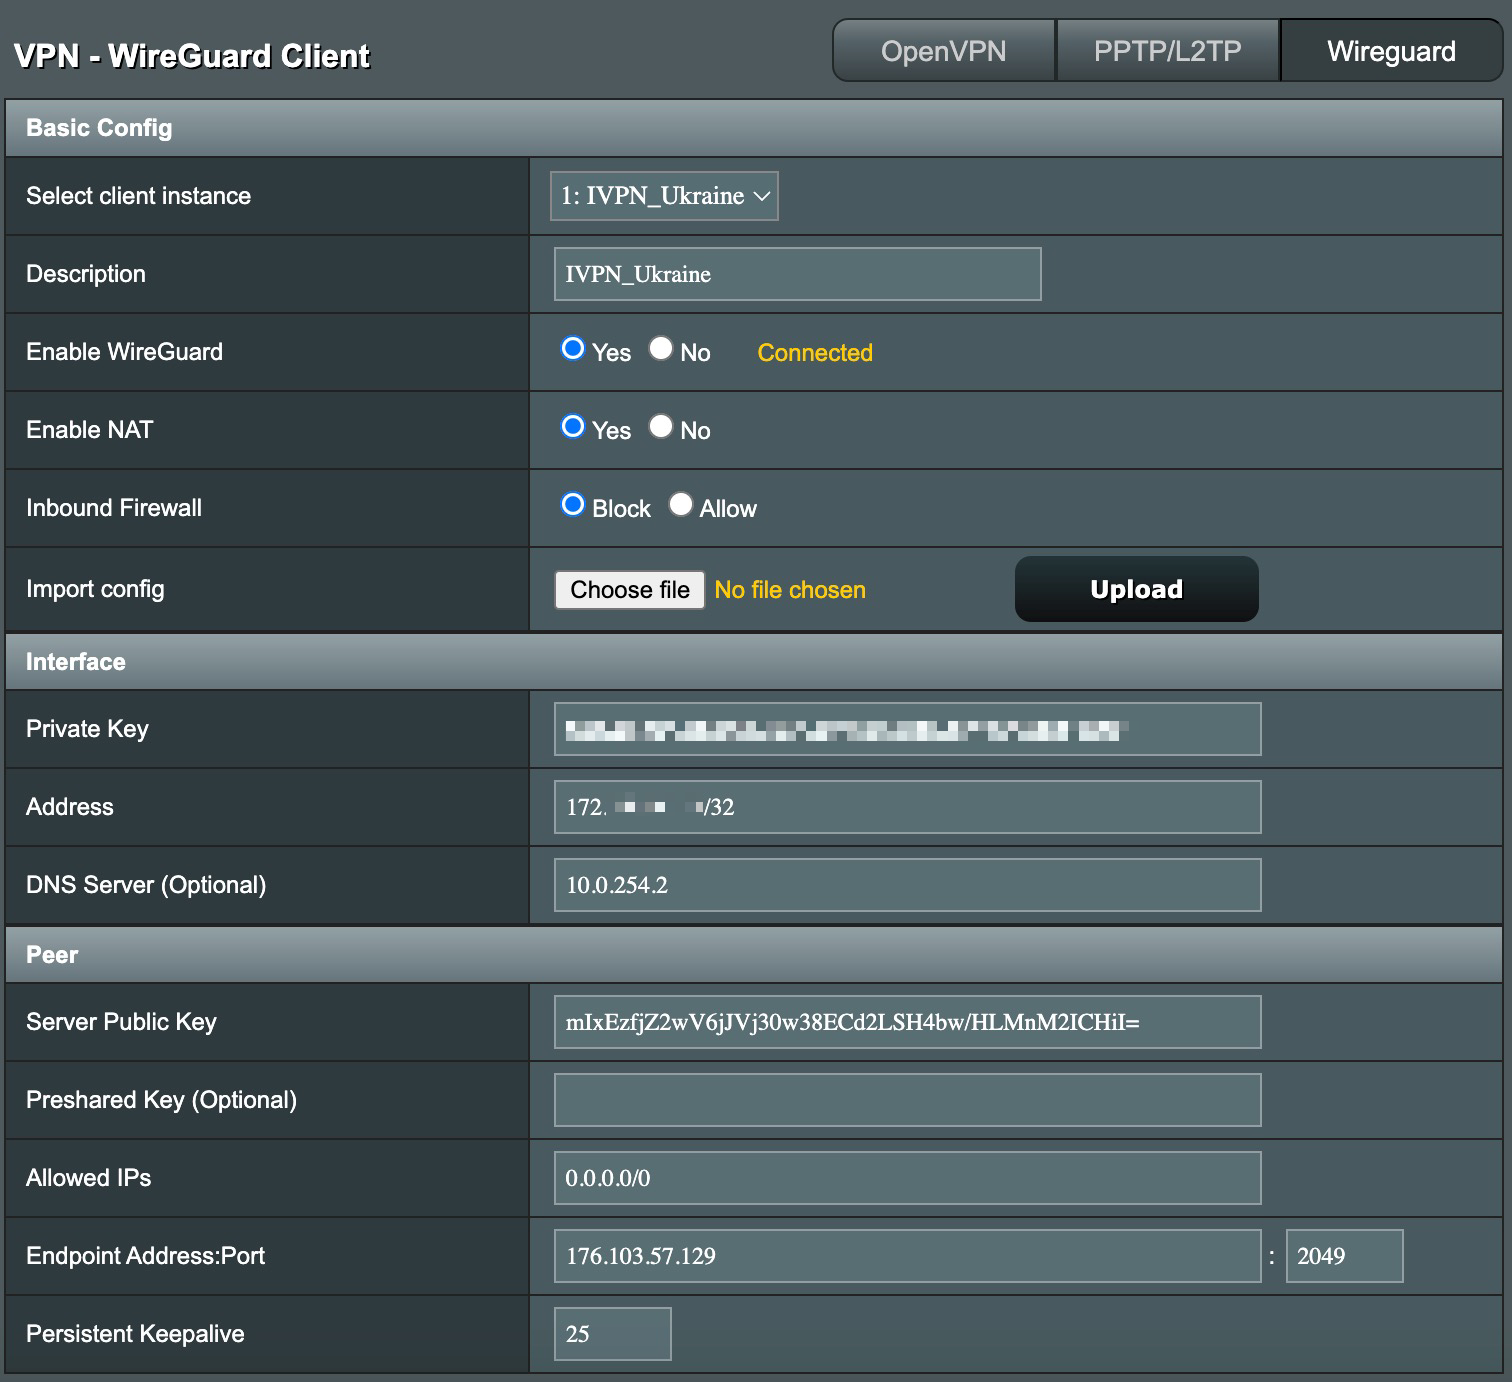
-
Navigate to
VPN-VPN Directorarea, scroll down, and click on the+icon to add a new rule for routing devices on your local network via the WireGuard interface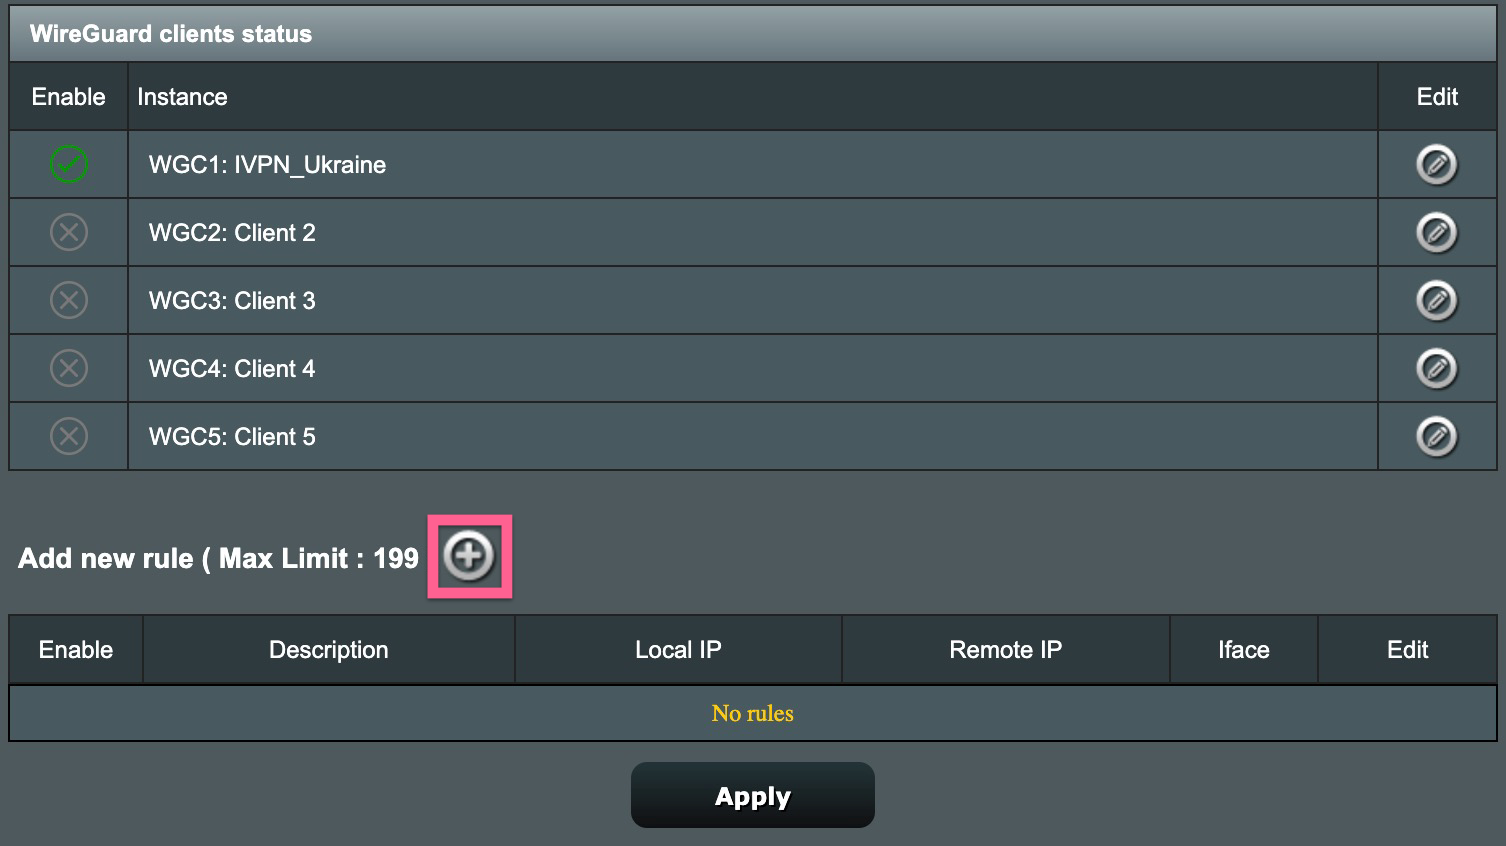
-
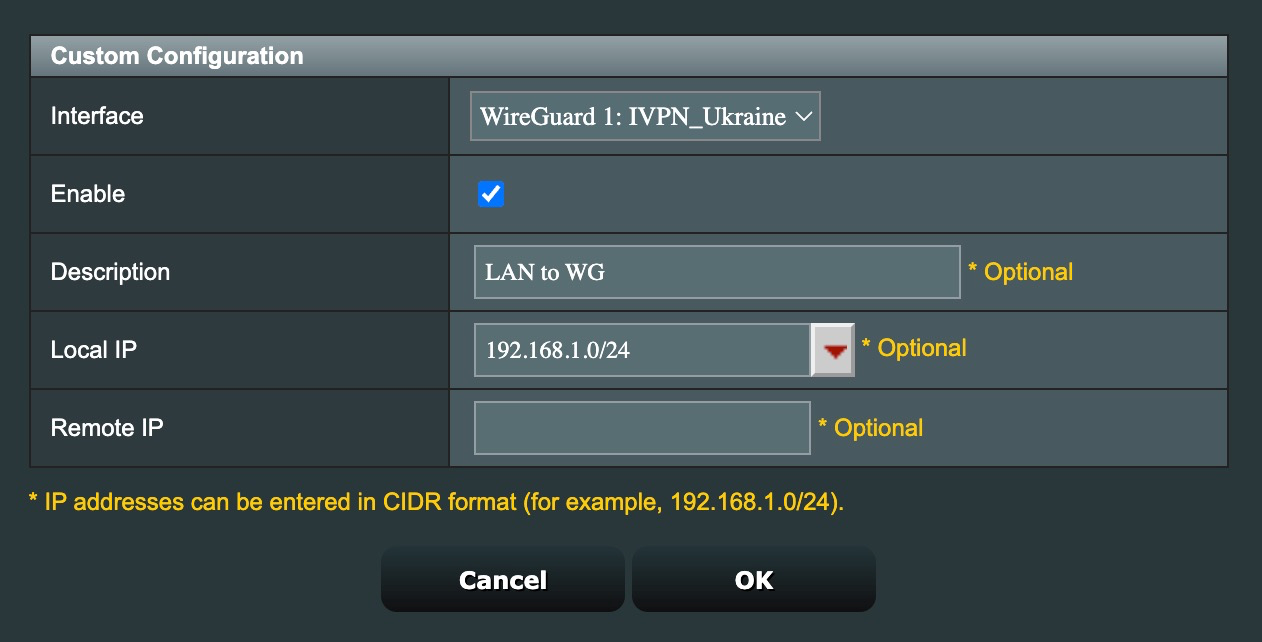
Fill in the following configuration:
Interface- select the recently created WireGuard interfaceEnable- checkDescription- give it any nameLocal IP- the address of your local network (e.g. 192.168.1.0/24) or IP address/es of your local network device/s separated with a comma if you wish to use VPN only on specific device/s
-
Click
OKandApply
Final steps
-
Reboot your router and wait for a minute or two for everything to settle, then reboot your computer system
-
To confirm that you are connected to the IVPN network, check the connection status tool on our website and run a dns leak test at https://www.dnsleaktest.com from any devices connected to your Asus router