Router Setup
OpenWrt WireGuard Setup Guide
Installing required packages
-
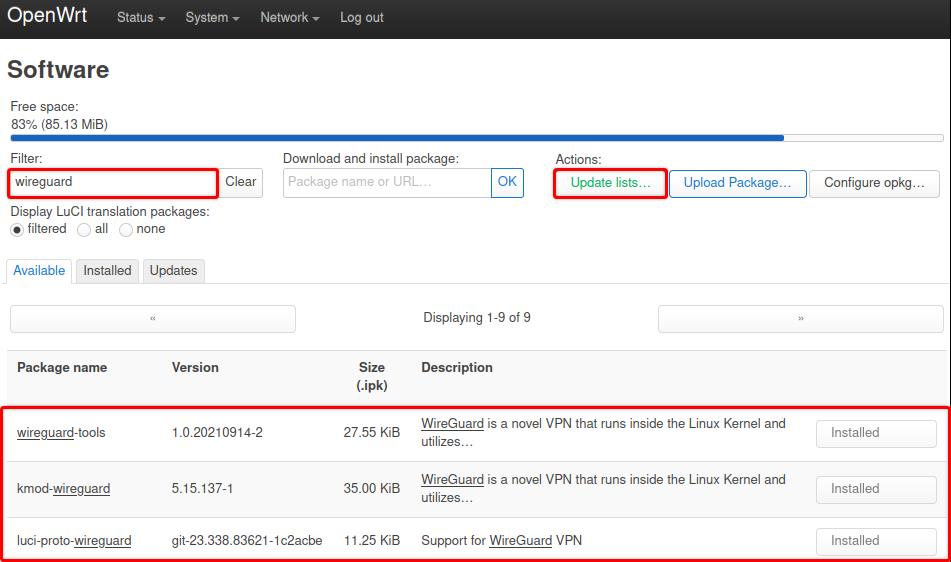
In your router’s webUI, navigate to
System-Software, clickUpdate lists. -
In the Filter field, type WireGuard, locate and install the wireguard-tools, kmod-wireguard, and luci-proto-wireguard packages.
-
Restart your router.
Creating an Interface
-
Generate a WireGuard config file with the preferred server and parameters. Extract the archive, open the file with any text editors and copy its contents.
WireGuard config file generator is only available for accounts that were created after November 2020 (account ID format: i-XXXX-XXXX-XXXX). If you have an IVPN subscription created before this date (account ID format: ivpnXXXXXXXX) and wish to make use of the feature, contact our customer service to help you make the switch. -
In OpenWRT, navigate to
Network-Interfaces, click on theAdd new interface. Give it any name, e.g. ivpnAustria, setProtocoltoWireGuard VPN, then click on theCreate interfacebutton. -
In the
General Settingstab, click on theLoad configuration...button, paste the contents of the WireGuard config file from step 1 and click on theImport settingsbutton.
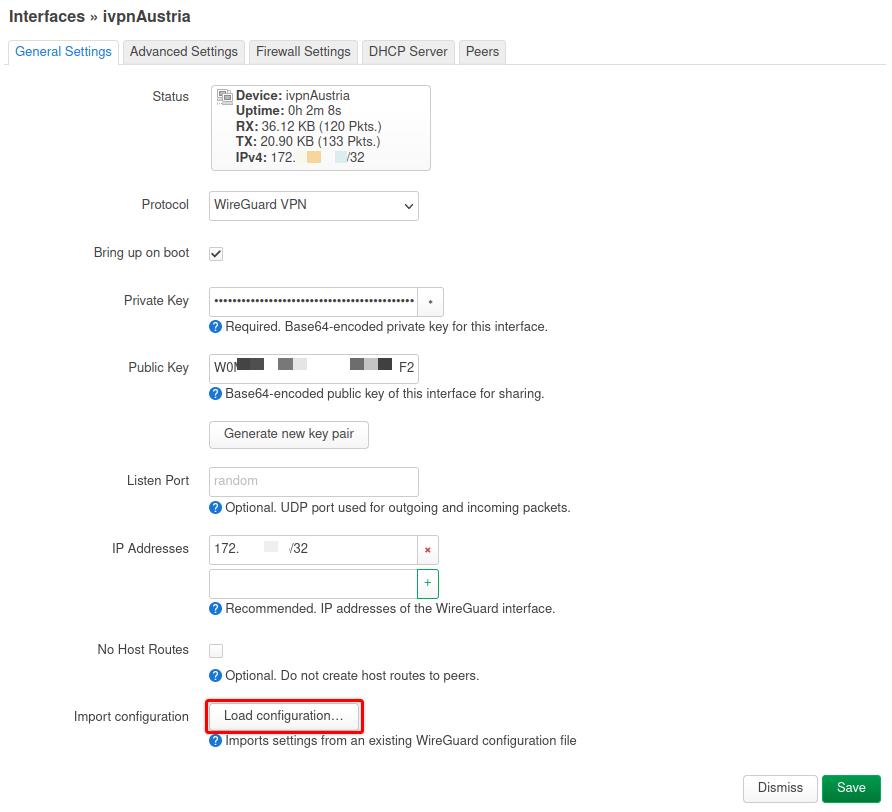
-
In the
Advanced Settingstab, setMTUto1412. -
In the
Peerstab, clickEditnext to the imported peer configuration, check theRoute Allowed IPsoption, setPersistent Keep Aliveto25and clickSave.
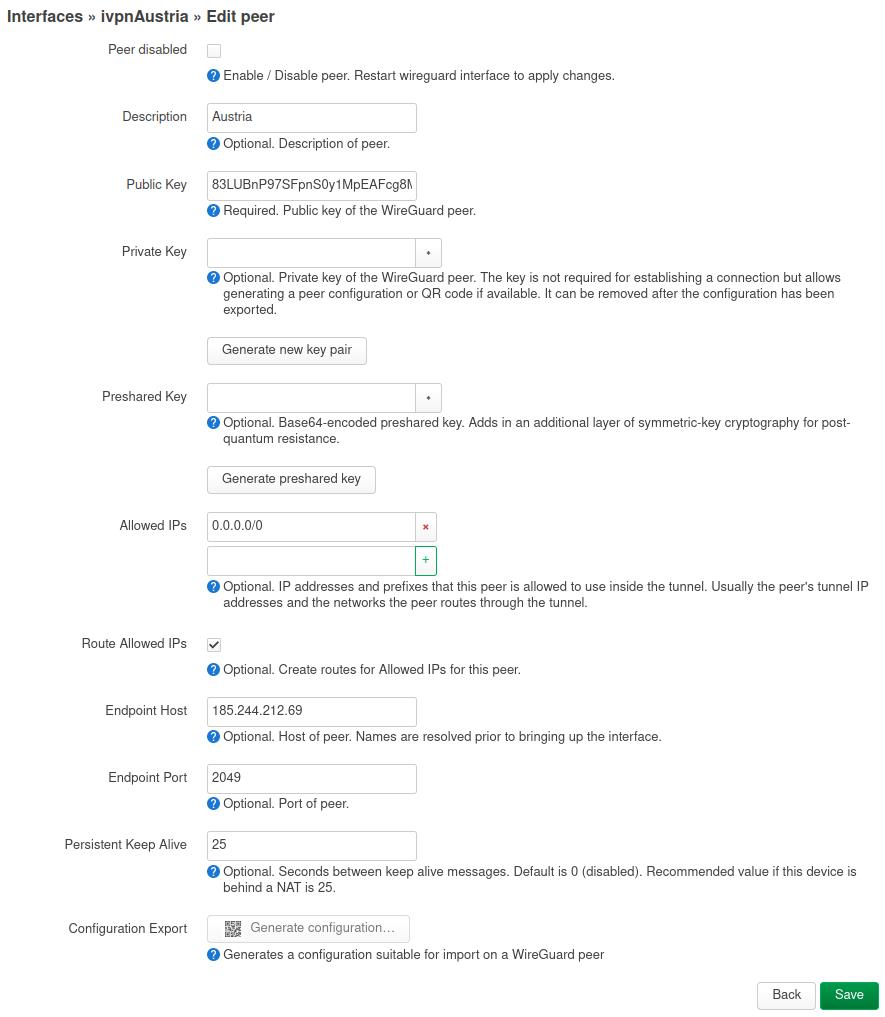
-
Click
Save & Apply.
Adding a Firewall zone
-
Navigate to
Network-Firewall -
Click the
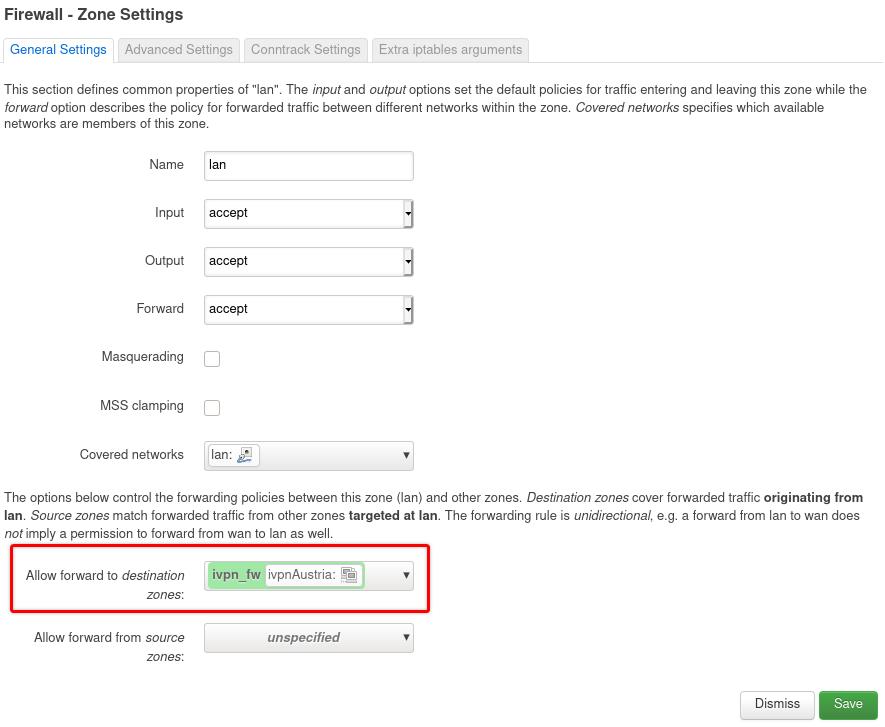
Addbutton and enter the following configuration:- Name - Give it any name, e.g. ivpn_fw
- Input - Reject
- Output - Accept
- Forward - Reject
- Masquerading - Checked
- MSS clamping - Checked
- Covered networks - select the previously created VPN tunnel interface, e.g. ivpnAustria
- Allow forward to destination zones - Unspecified
- Allow forward from source zones - lan
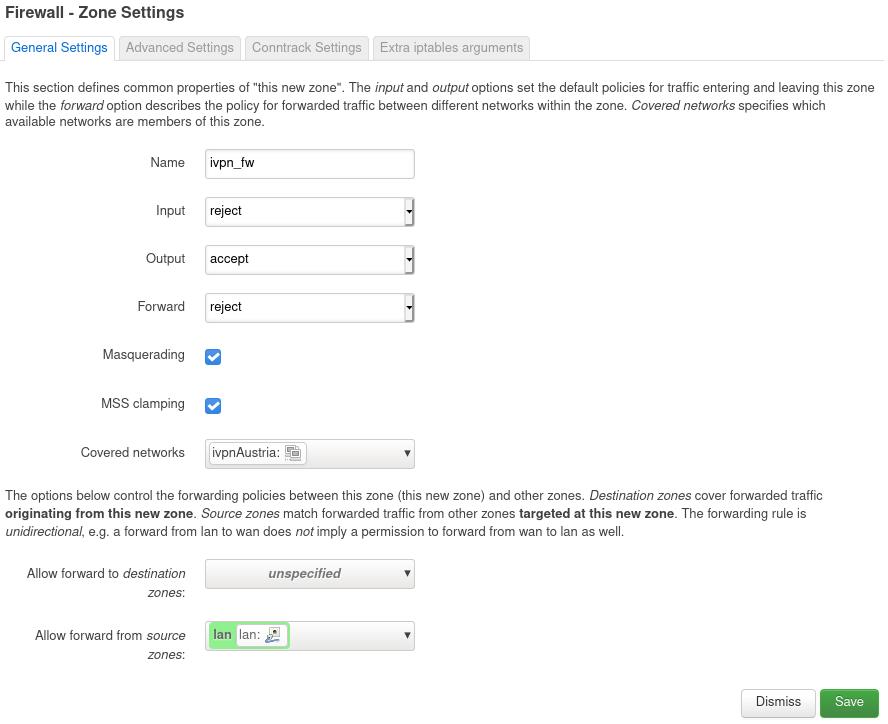
-
Click
Save&Save & Apply
Configuring a Kill-switch (optional)
To ensure the traffic on your LAN devices travels strictly via the VPN tunnel and to prevent any possible leaks if the router disconnects from the VPN server for any reason, edit your lan firewall zone and remove WAN from the Allow forward to destination zones field, then click Save & Save & Apply buttons.
DNS
-
Navigate to
Network-Interfaces -
Click on the
Editbutton next to the WAN interface -
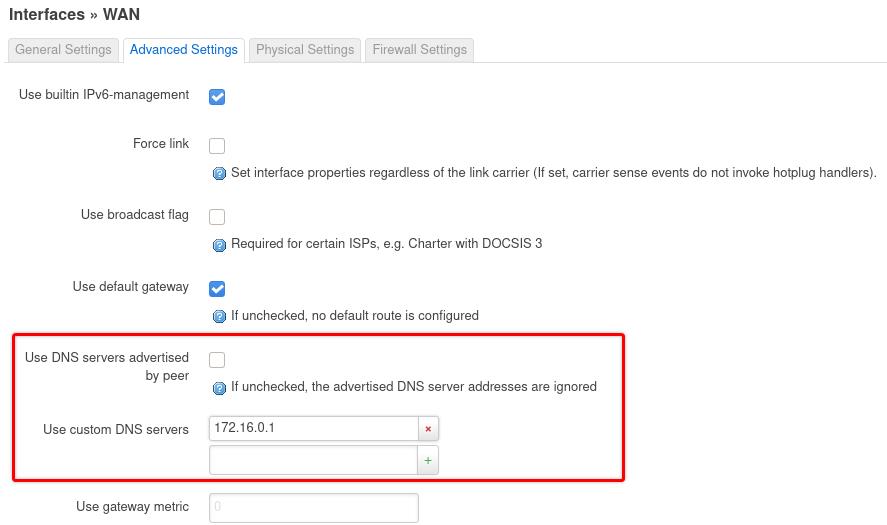
In the
Advanced Settingstab, uncheck theUse DNS servers advertised by peerand enter the WireGuard regular DNS server IP address (172.16.0.1) or the one associated with the preferred AntiTracker list.
-
Click
Save. -
If your ISP additionally provides you with an IPv6 IP address, repeat steps 2 to 4 for the WAN6 interface.
-
Click
Save & Apply.
Final Steps
- A device reboot is not required, though it may be useful to confirm that everything behaves as expected.
- Run a leak test at https://www.dnsleaktest.com via one of the internal network clients attached to your OpenWRT router.
Useful Links
- If you plan to use a Multi-hop connection, please see this guide to make the required change in the WireGuard config file or via an existing WireGuard interface’s
Peer - Edit - Endpoint Port. - To mitigate the TunnelVision vulnerability, check this IVPN knowledge base article.