Router Setup
OpenWrt WireGuard Setup Guide
Install required packages
-
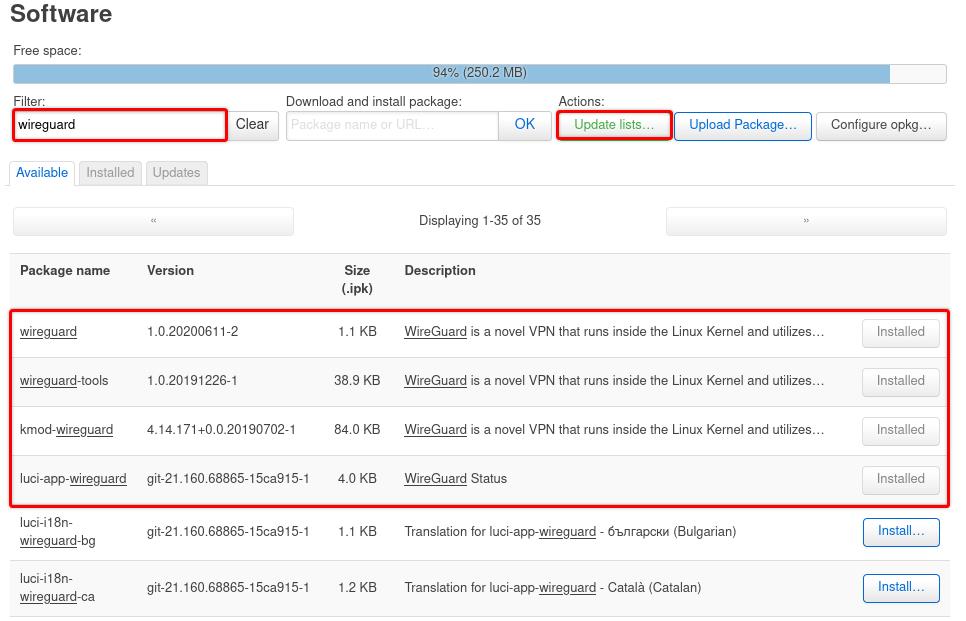
In your router’s webUI, navigate to
System-Software, clickUpdate lists -
In the Filter field, type WireGuard, locate and install the wireguard, wireguard-tools, kmod-wireguard, and luci-app-wireguard packages. Note: The wireguard package is included in version 21.02.
-
Restart your router
Generate WireGuard keypair
- SSH into your router as ‘root’ (OpenWrt Wiki):
ssh root@192.168.1.1
- Generate WireGuard keys:
wg genkey | tee privatekey | wg pubkey > publickey
chmod 600 privatekey
- Note your Private & Public keys, you will need them later:
cat privatekey
cat publickey
Obtain WireGuard IP address
- Log into the Client Area
- Navigate to
WireGuardtab and click theAdd a new keybutton
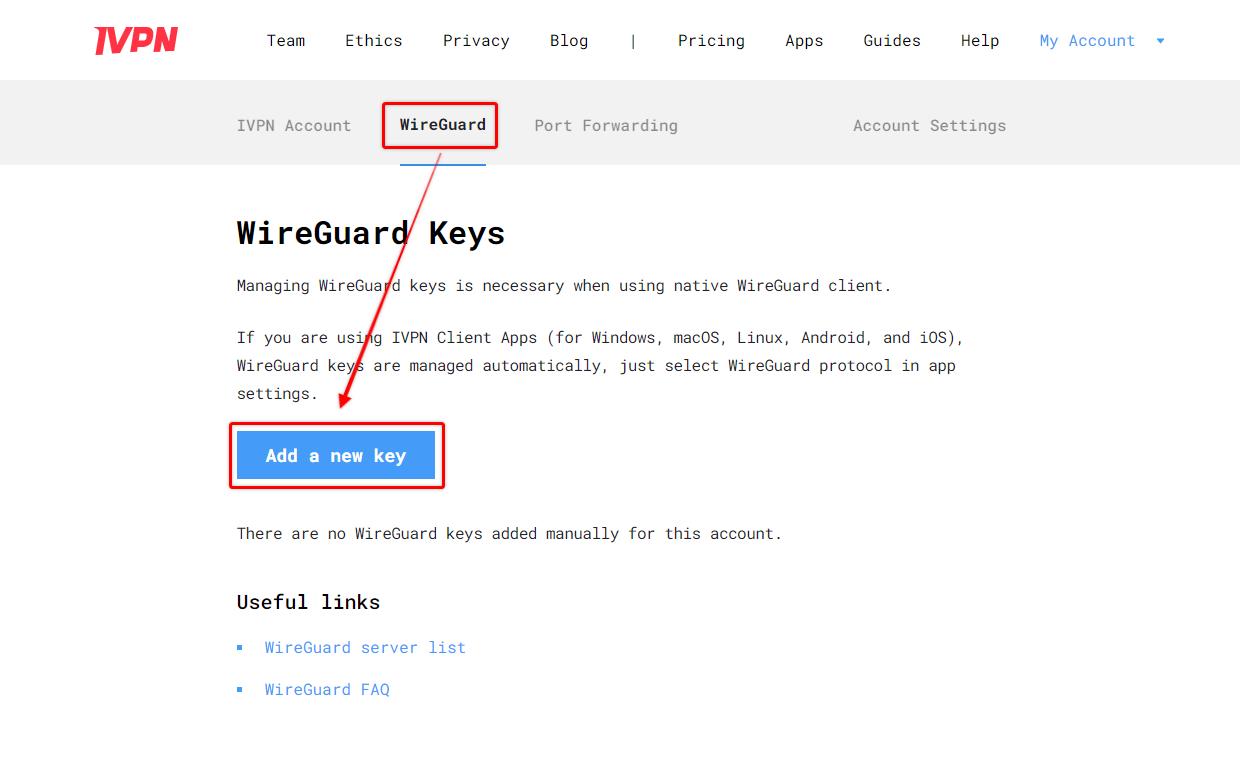
- Copy and paste the Public key obtained previously, give it any name, then click the
Add keybutton and note the assigned IP address

Create an Interface
-
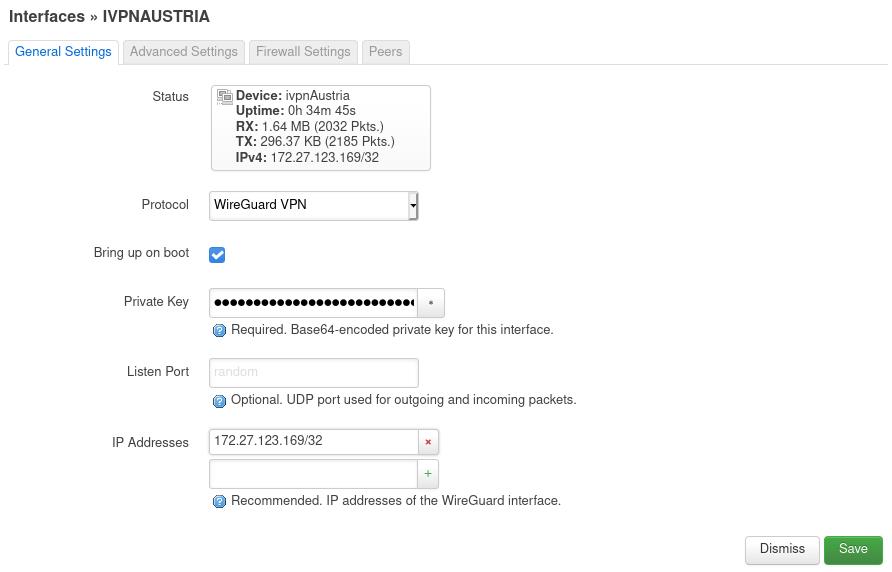
Navigate to
Network-Interface, -
Click the
Add new interface...button and enter the following configuration:- Name - give it any name, e.g. ivpnAustria
- Protocol - WireGuard VPN
-
Create interface -
In the
General Settingstab:- Bring up on boot - Checked
- Private Key - copy and paste the generated previously Private key
- IP Address - enter the WireGuard IP Address obtained in the Client Area ending with /32, e.g. 172.27.123.169/32
-
In the
Advanced Settingstab, setMTUto 1412 -
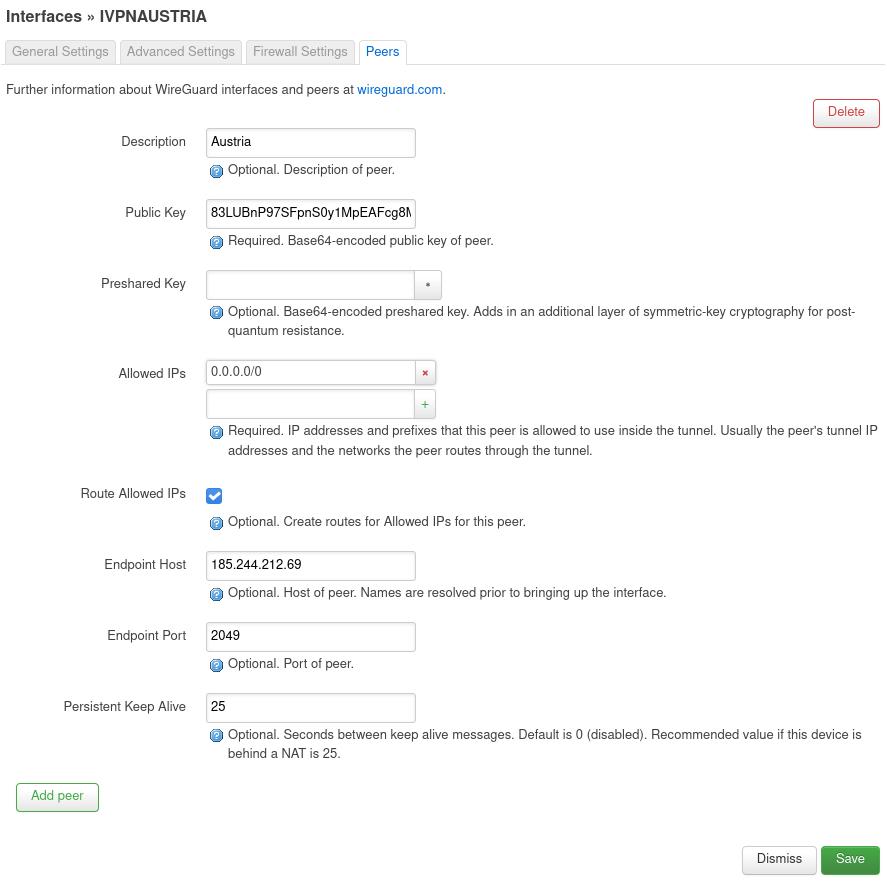
In the
Peerstab:- Description - give it any name, e.g. Austria
- Public Key - the IVPN WireGuard server public key, available on the IVPN server status page
- Allowed IPs - 0.0.0.0/0
- Route Allowed IPs - Checked
- Endpoint Host - an IP address of IVPN WireGuard server
Hostnames are available on the IVPN server status page. To turn the hostname of the server into an IP address use, e.g. thenslookup at1.wg.ivpn.netcommand in your computer’s terminal:
$ nslookup at1.wg.ivpn.net
…
Name: at1.wg.ivpn.net
Address: 185.244.212.69- Endpoint Port - 53, 80, 443, 1194, 2049, 2050, 30587, 41893, 48574 or 58237. All ports are equally secure
- Persistent Keep Alive - 25 seconds is reasonable
-
Click
Save&Save & Apply
Add a Firewall zone
-
Navigate to
Network-Firewall -
Click the
Addbutton and enter the following configuration:- Name - Give it any name, e.g. ivpn_fw
- Input - Reject
- Output - Accept
- Forward - Reject
- Masquerading - Checked
- MSS clamping - Checked
- Covered networks - select the previously created VPN tunnel interface, e.g. ivpnAustria
- Allow forward to destination zones - Unspecified
- Allow forward from source zones - lan
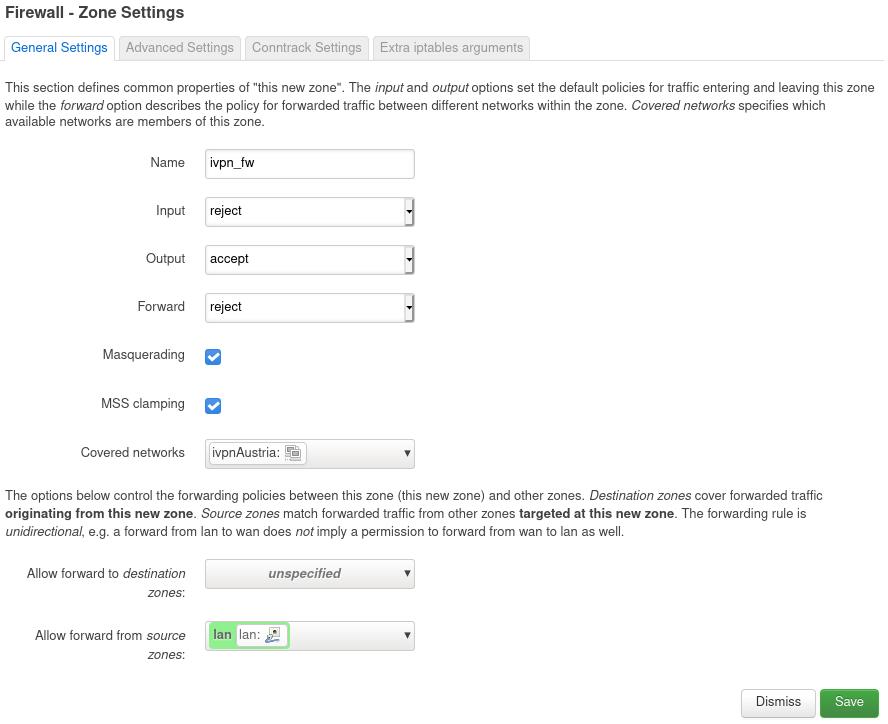
-
Click
Save&Save & Apply
Configuring a Kill-switch (optional)
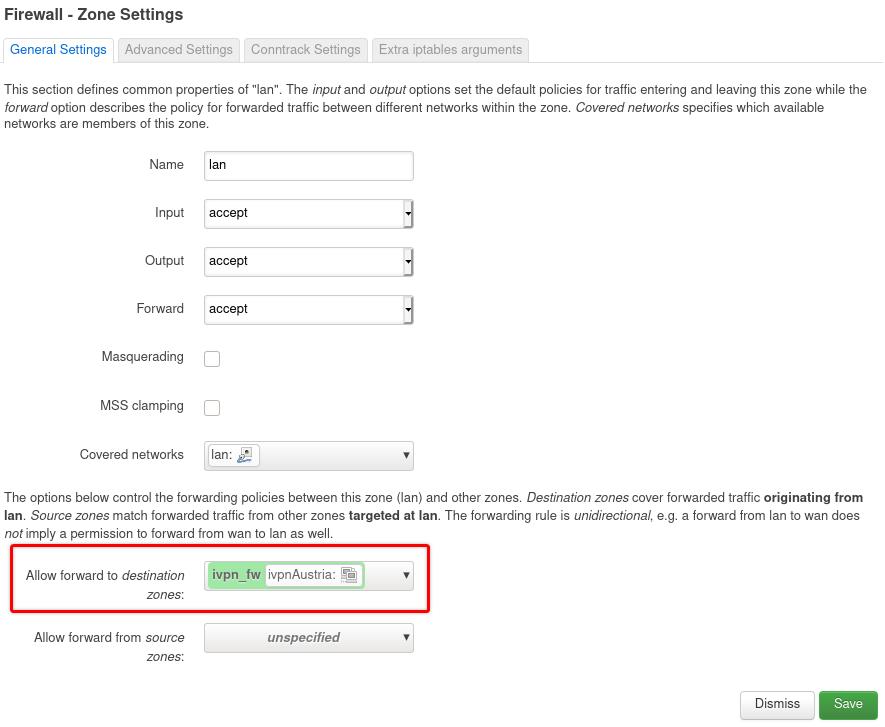
To ensure the traffic on your LAN devices travels strictly via the VPN tunnel and to prevent any possible leaks if the router disconnects from the VPN server for any reason, edit your lan firewall zone and remove WAN from the Allow forward to destination zones field, then click Save & Save & Apply buttons.
DNS
-
Navigate to
Network-Interfaces -
Click on the
Editbutton next to the WAN interface -
In the
Advanced Settingstab, uncheck theUse DNS servers advertised by peerand specify one of the following DNS servers in theUse custom DNS serversfield:- 172.16.0.1 = regular DNS with no blocking
- 10.0.254.2 = standard AntiTracker to block advertising and malware domains
- 10.0.254.3 = Hardcore Mode AntiTracker to also block Google and Facebook domains
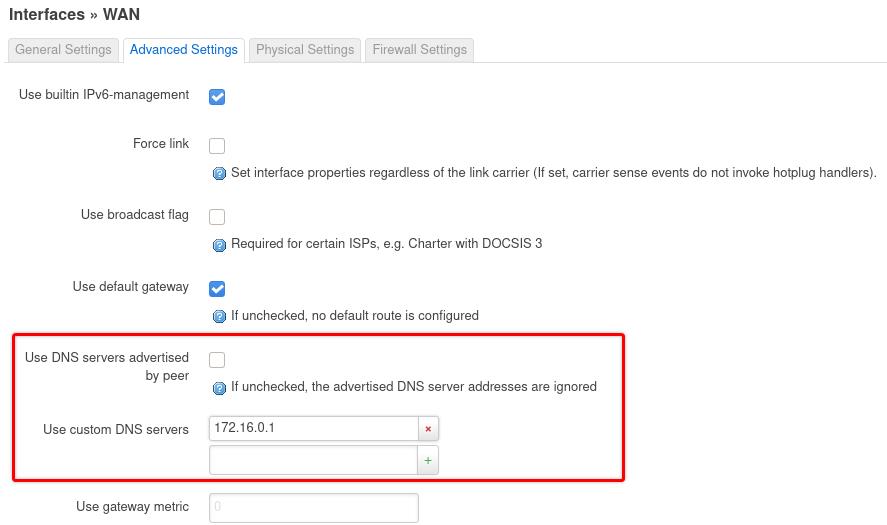
-
Click the
Savebutton. -
For firmware version 21.02, repeat steps 2 to 4 for the IVPN WireGuard and WAN6 interfaces. For firmware version 19.07, repeat steps 2 to 4 for the WAN6 interface.
-
Click the
Save & Applybutton.
Final Steps
- A device reboot is not required, though it may be useful to confirm that everything behaves as expected.
- Run a leak test at https://www.dnsleaktest.com via one of the internal network clients attached to your OpenWRT router.
Please note: If you plan to use a Multi-hop setup please see this guide and make the required changes to the Endpoint Address port and Peer Public Key.