Router Setup
OpenWrt OpenVPN Setup Guide
Install required packages
-
In your router’s webUI, navigate to
System-Software, clickUpdate lists. -
In the Filter field, type OpenVPN, locate and install openvpn-openssl & luci-app-openvpn packages
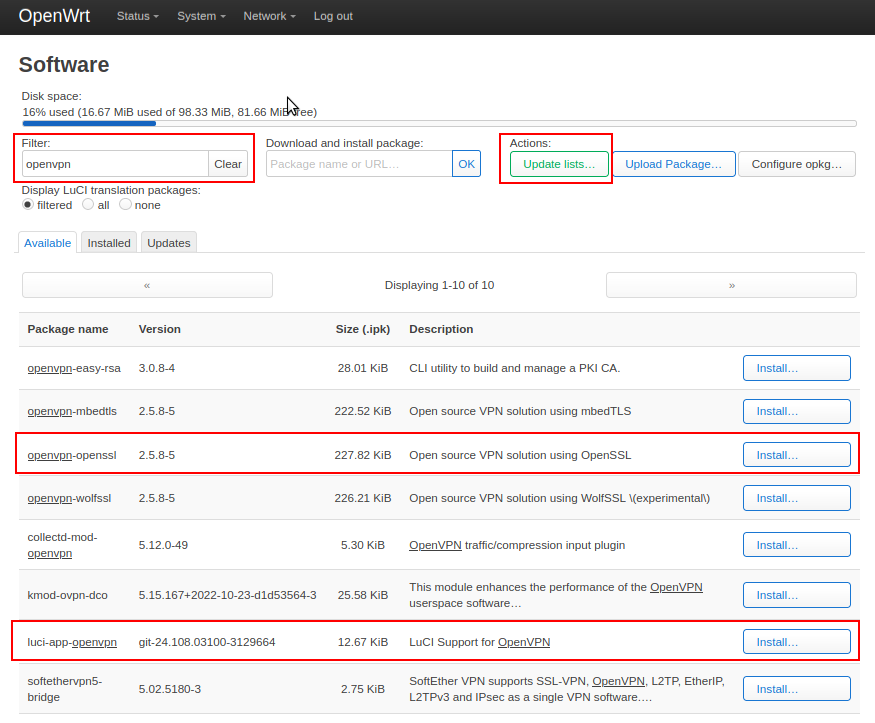
-
Restart your router.
If you receive an error while attempting to install the 'luci-app-openvpn' package, check the 'Overwrite files from other package(s)' checkbox
Create a VPN profile
-
Download and extract our config files to your computer. Choose the IP address option on the configuration generator. Choose OpenVPN 2.5.
-
In your router, navigate to
VPN-OpenVPN. -
Under the OVPN configuration file upload section,
Browsefor the .ovpn config file with the VPN server you would like to connect to, give it any name, then clickUpload. -
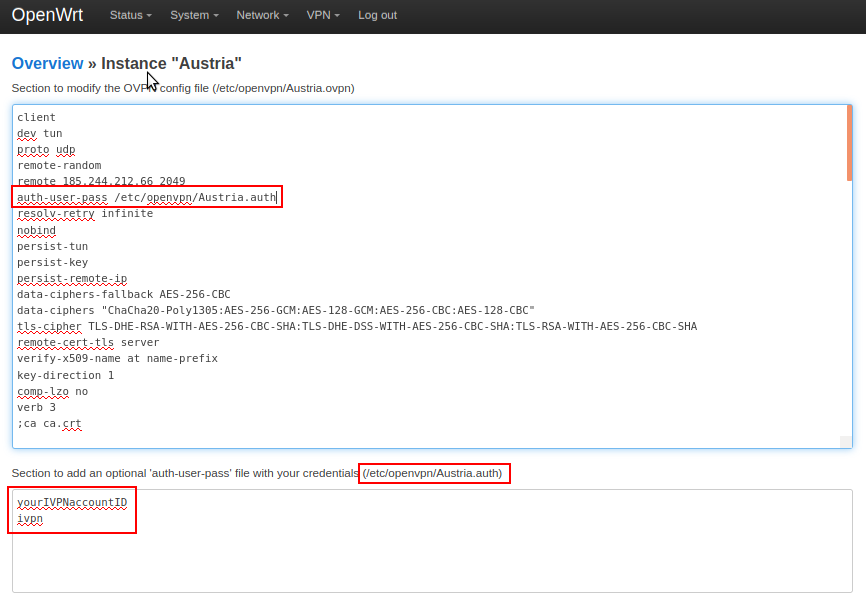
Click the
Editbutton next to the created OpenVPN instance and enter your IVPN account ID that begins with letters ‘ivpnXXXXXXXX’ or ‘i-XXXX-XXXX-XXXX’ (case-sensitive) and any password (e.g. ivpn) in 2 separate lines in the text box at the bottom. -
Append the credentials file path to the auth-user-pass line in the first text box. The full path is visible just above the second text box, e.g. -
auth-user-pass /etc/openvpn/Austria.auth. ClickSave
-
Click
Save. Return to mainOpenVPNsection, check theEnabledcheckbox and click on theSave & Applybutton.
Create an Interface
-
Navigate to
Network-Interfaces -
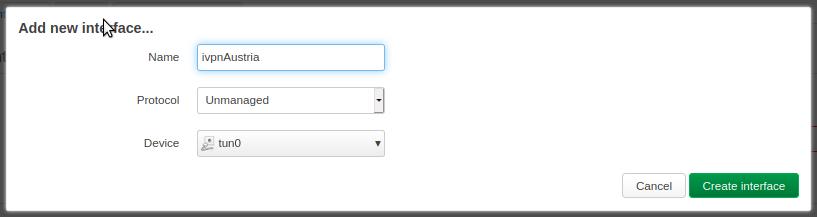
Click on the
Add new interfacebutton and enter the following configuration:- Name - Give it any name, e.g. ivpnAustria
- Protocol - Unmanaged
- Interface - tun0
-
Create interface -
In the interface properties window, ensure that Bring up on boot is checked, then click
Save&Save & Applybuttons.
Add a Firewall zone
-
Navigate to
Network-Firewall -
Click the
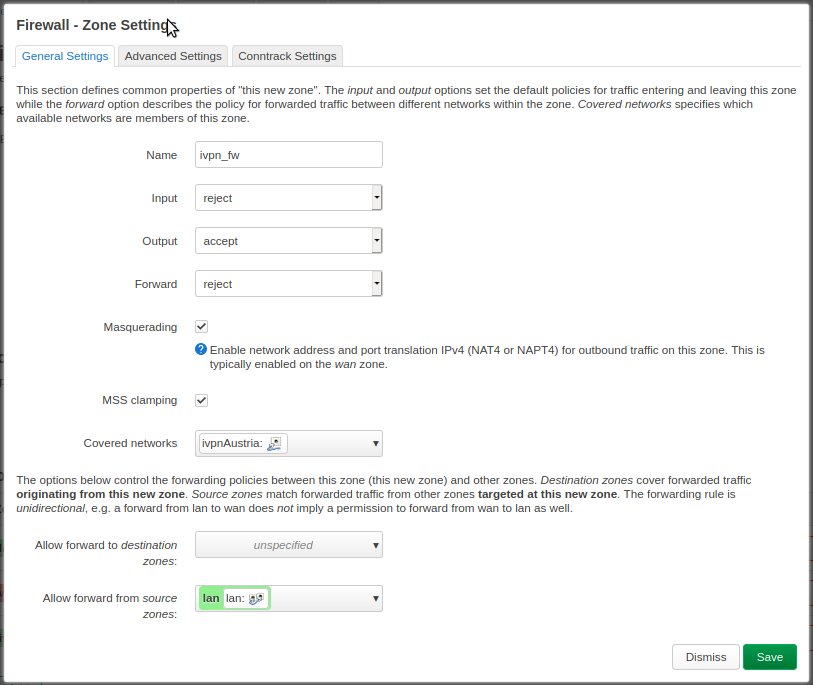
Addbutton and enter the following configuration:- Name - Give it any name, e.g. ivpn_fw
- Input - Reject
- Output - Accept
- Forward - Reject
- Masquerading - Checked
- MSS clamping - Checked
- Covered networks - select the previously created VPN tunnel interface, e.g. ivpnAustria
- Allow forward to destination zones - Unspecified
- Allow forward from source zones - lan
-
Click
Save&Save & Applybuttons.
Configure a Kill-switch (optional)
To ensure the traffic on your LAN devices travels strictly via the VPN tunnel and to prevent any possible leaks if the router disconnects from the VPN server for any reason, edit your lan firewall zone and remove WAN from the Allow forward to destination zones field, then click Save & Save & Apply buttons.

DNS
-
Navigate to
Network-Interfaces -
Click on the
Editbutton next to the WAN interface -
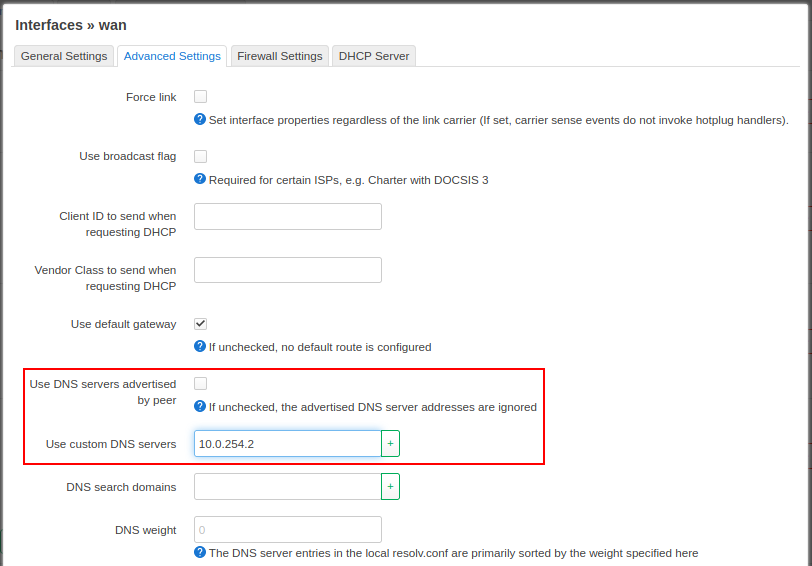
In the
Advanced Settingstab, uncheck theUser DNS servers advertised by peerand specify one IVPN DNS server in theUse custom DNS serversfield. The list of IVPN DNS server IP addresses, including the AntiTracker, is available here.
- Click
Save&Save & Applybuttons.
Final Steps
- A device reboot is not required, though it may be useful to confirm that everything behaves as expected.
- Run a leak test at https://www.dnsleaktest.com via one of the internal network clients attached to your OpenWRT router.
Useful Links
- If you plan to use a Multi-hop connection, please see this guide to make the required changes in the
.ovpnconfig file. - To mitigate the TunnelVision vulnerability, check this IVPN knowledge base article.
- Add OBFS3 and OBFS4 obfuscation with obfs4proxy.