Router Setup
Asuswrt-Merlin OpenVPN Setup Guide
Configuring the VPN tunnel
-
Generate and download the .zip archive containing the OpenVPN config file with the selected server and configuration
-
Extract the archive, launch the web browser and enter the IP address of your router, which is usually
192.168.1.1 -
Once logged in, navigate to
VPN–VPN Clienttab -OpenVPN -
Click on the
Choose filebutton. Open the extracted earlier .ovpn config file, hit theUploadbutton and select the following configuration:- Put any name into the
Descriptionfield Accept DNS Configuration- Exclusive (this option ensures that only DNS server provided by the VPN server is used)Redirect Internet traffic through tunnel- Yes (all)- (optional)
Automatic start at boot time- Yes - (optional)
Killswitch - Block routed clients if tunnel goes down- Yes
- Put any name into the
-
Enter your IVPN account id into the
Usernamefield (i-XXXX-XXXX-XXXX or ivpnXXXXXXXX) and any string into thePasswordfield, e.g. ‘ivpn’. ClickApply -
Toggle
Service stateswitch On to connect.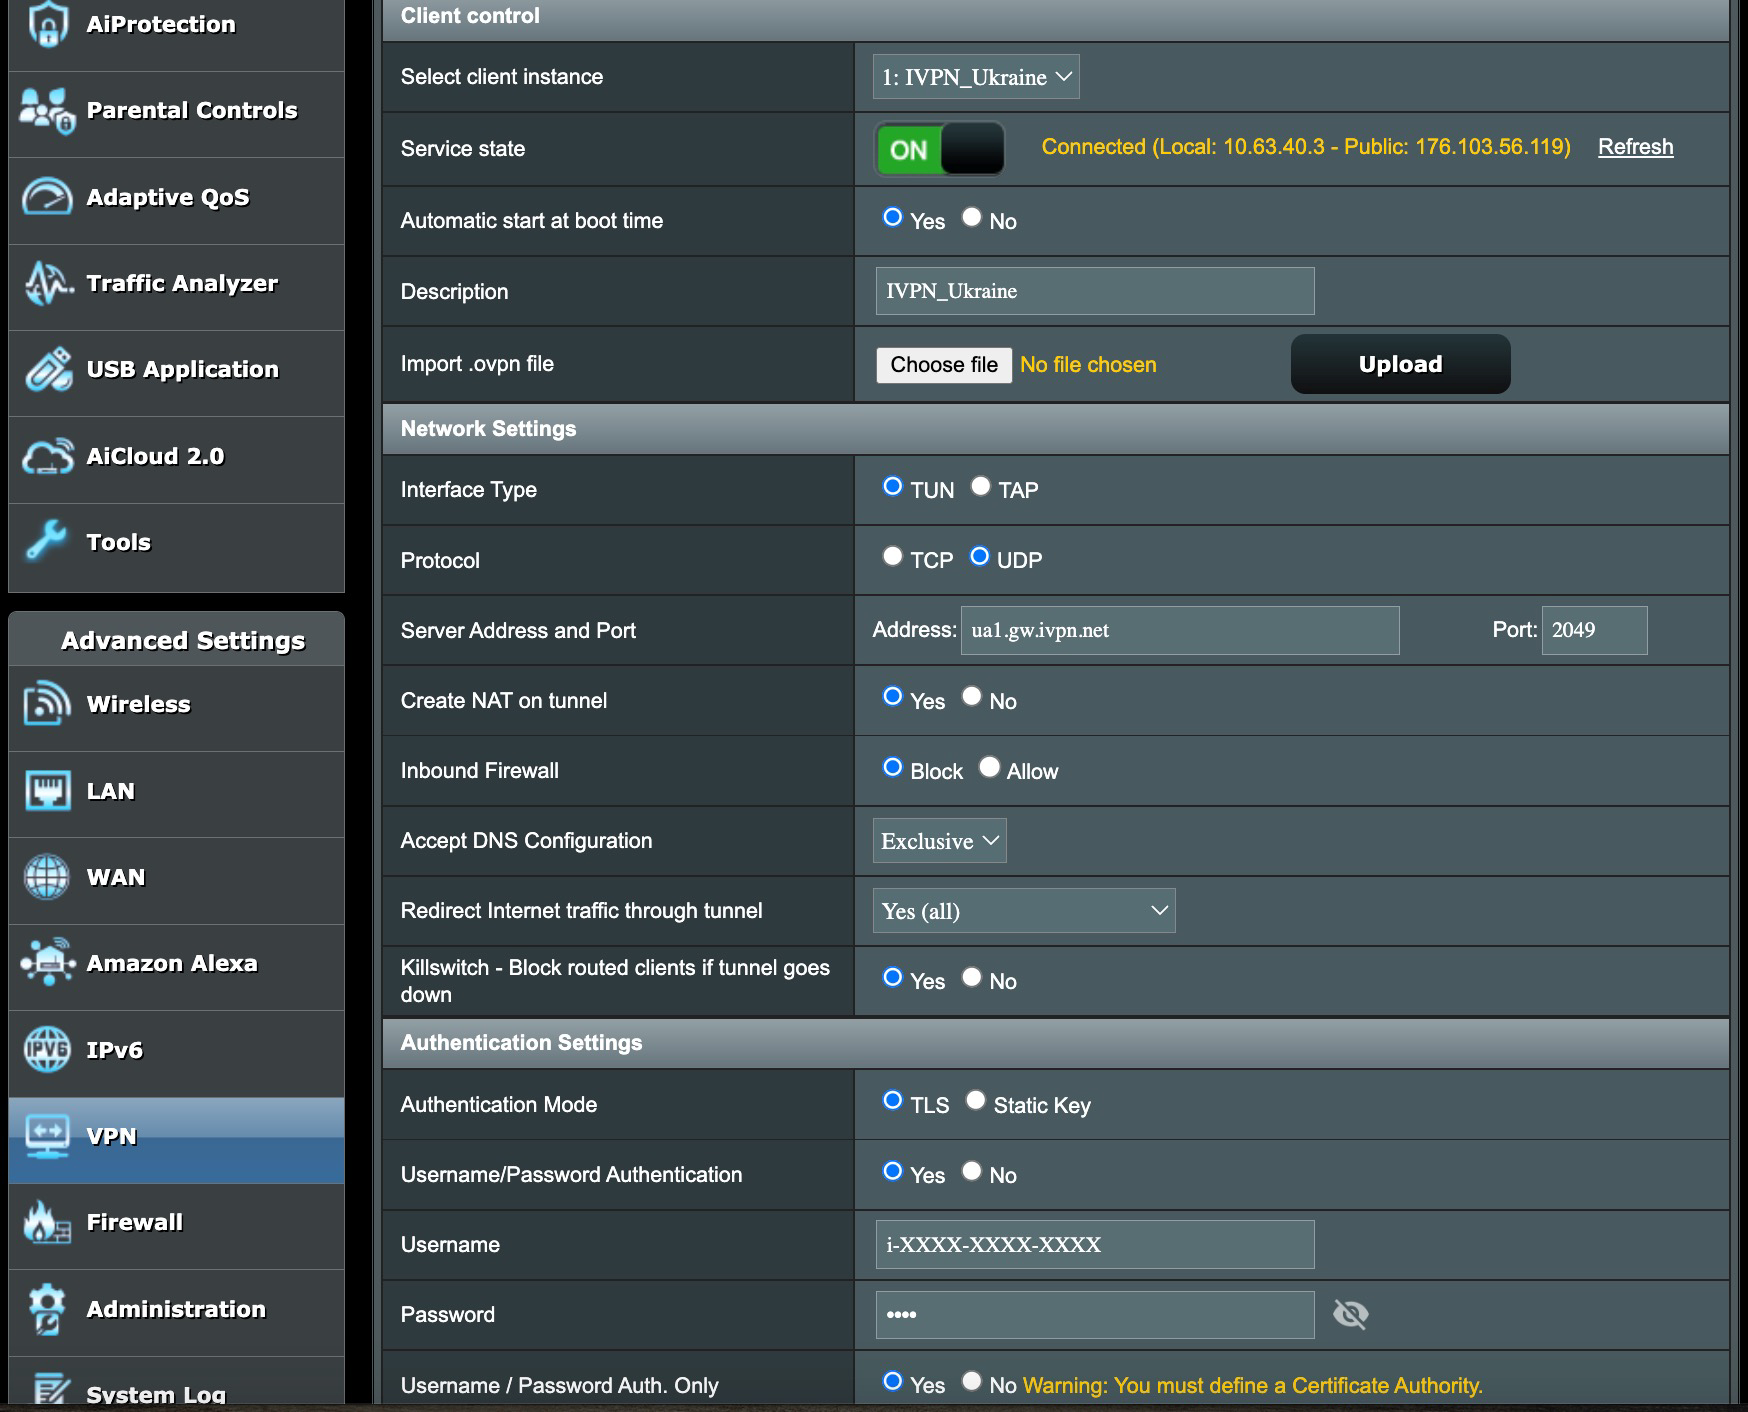
Final steps
-
Reboot your router and wait for a minute or two for everything to settle, then reboot your computer system
-
To confirm that you are connected to the IVPN network, check the connection status tool on our website and run a dns leak test at https://www.dnsleaktest.com from any devices connected to your Asus router