Router Setup
Tomato OpenVPN Setup Guide
Basic Tomato Setup
-
Launch the web browser and enter the IP address of your router -
http://192.168.1.1/, by default. -
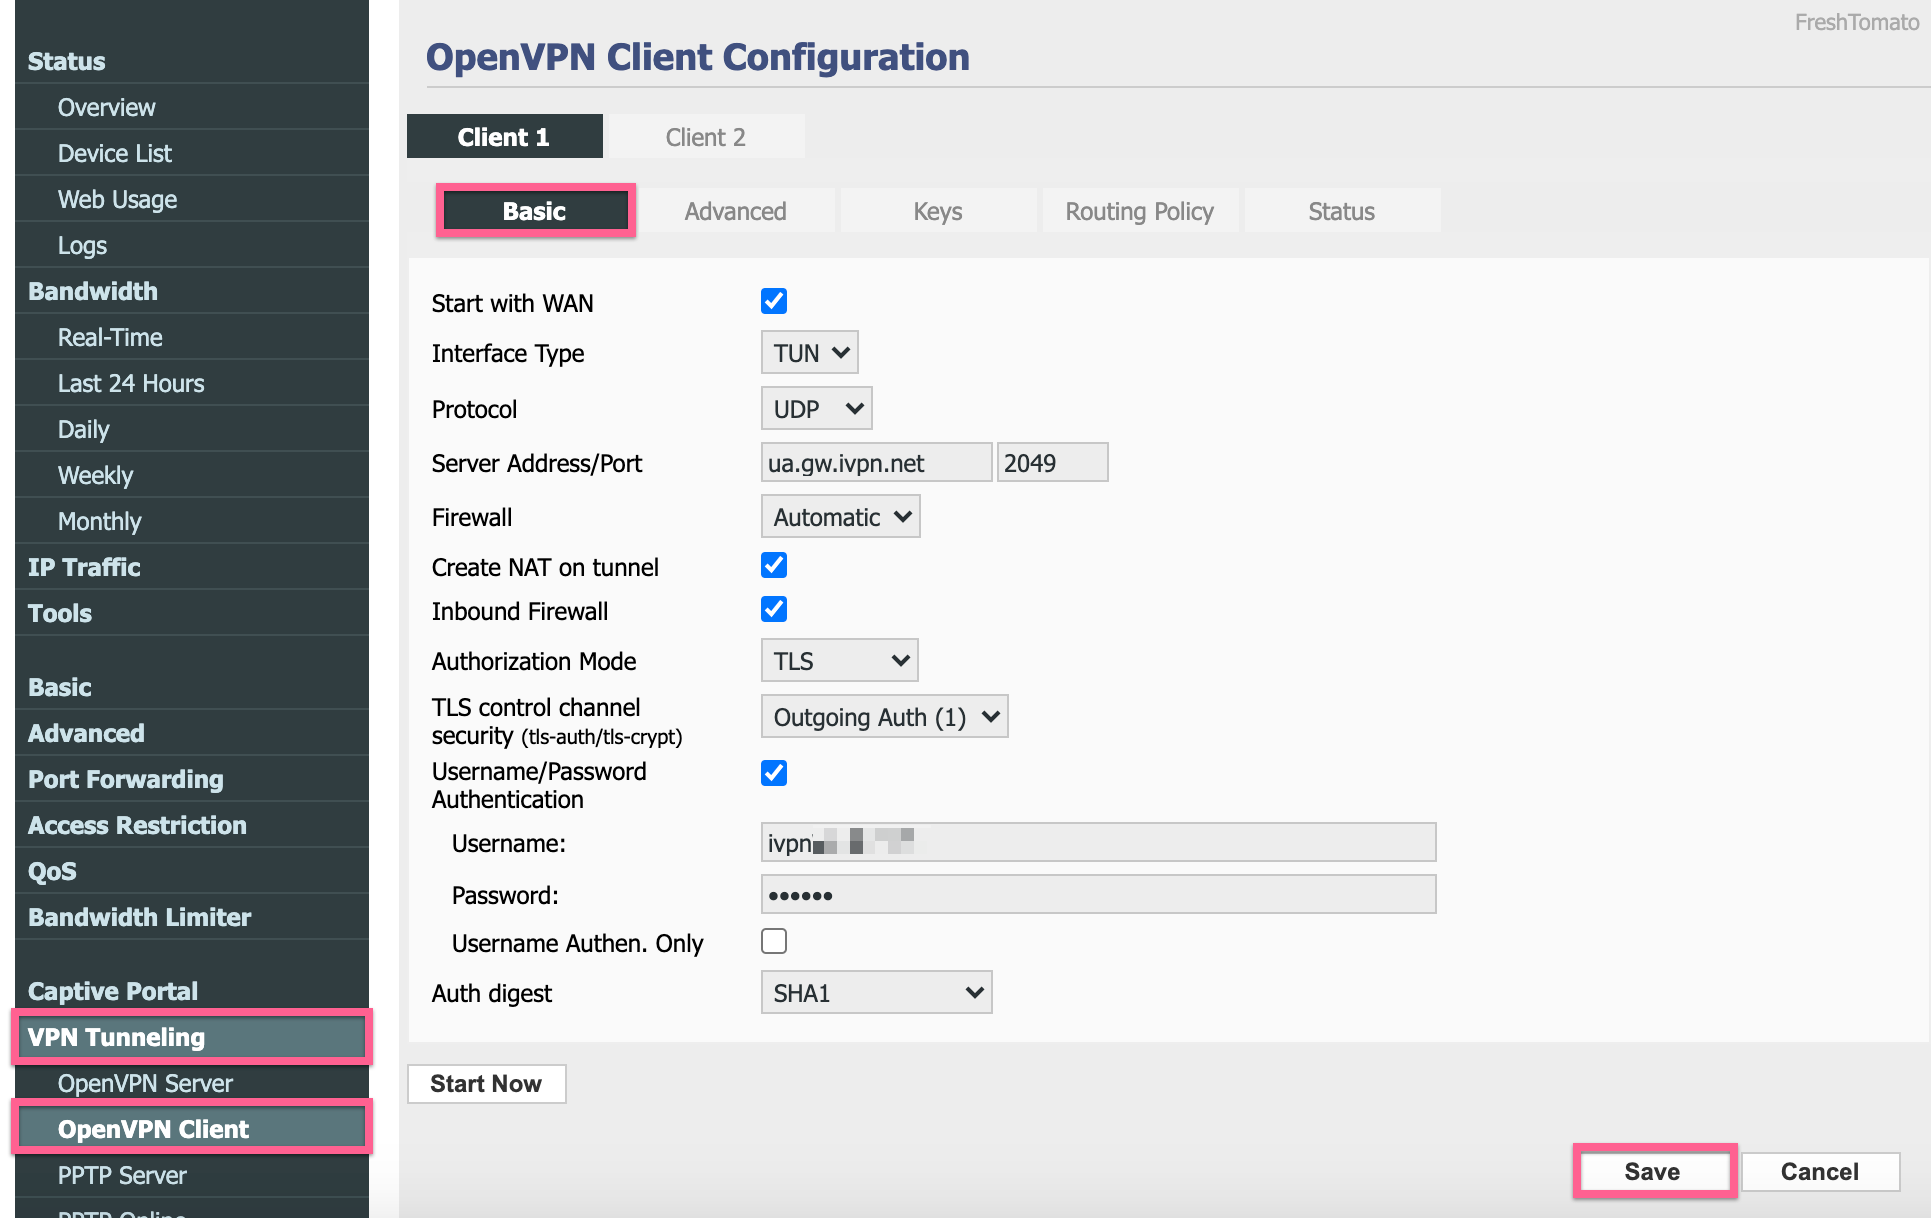
Navigate to
VPN Tunneling>OpenVPN Client>Basic. -
Enter the following configuration:
- Start with WAN: Check
- Interface Type: TUN
- Protocol: UDP
- Server Address/Port: Enter a server name from the server status page, e.g.
ua.gw.ivpn.netand Port2049
You can also use ports UDP: 53, 80, 443, 1194, 2050 & TCP: 80, 443, 1443- Firewall: Automatic
- Create NAT on tunnel: Check
- Inbound Firewall: Check
- Authorization Mode: TLS
- TLS control channel: Outgoing Auth (1)
- Username/Password Authentication: Check. Enter your account ID that begins with letters ‘ivpnXXXXXXXX’ or ‘i-XXXX-XXXX-XXXX’ (case-sensitive) and any password (ie.
ivpn). - Auth digest: SHA1
- Click
Save.
-
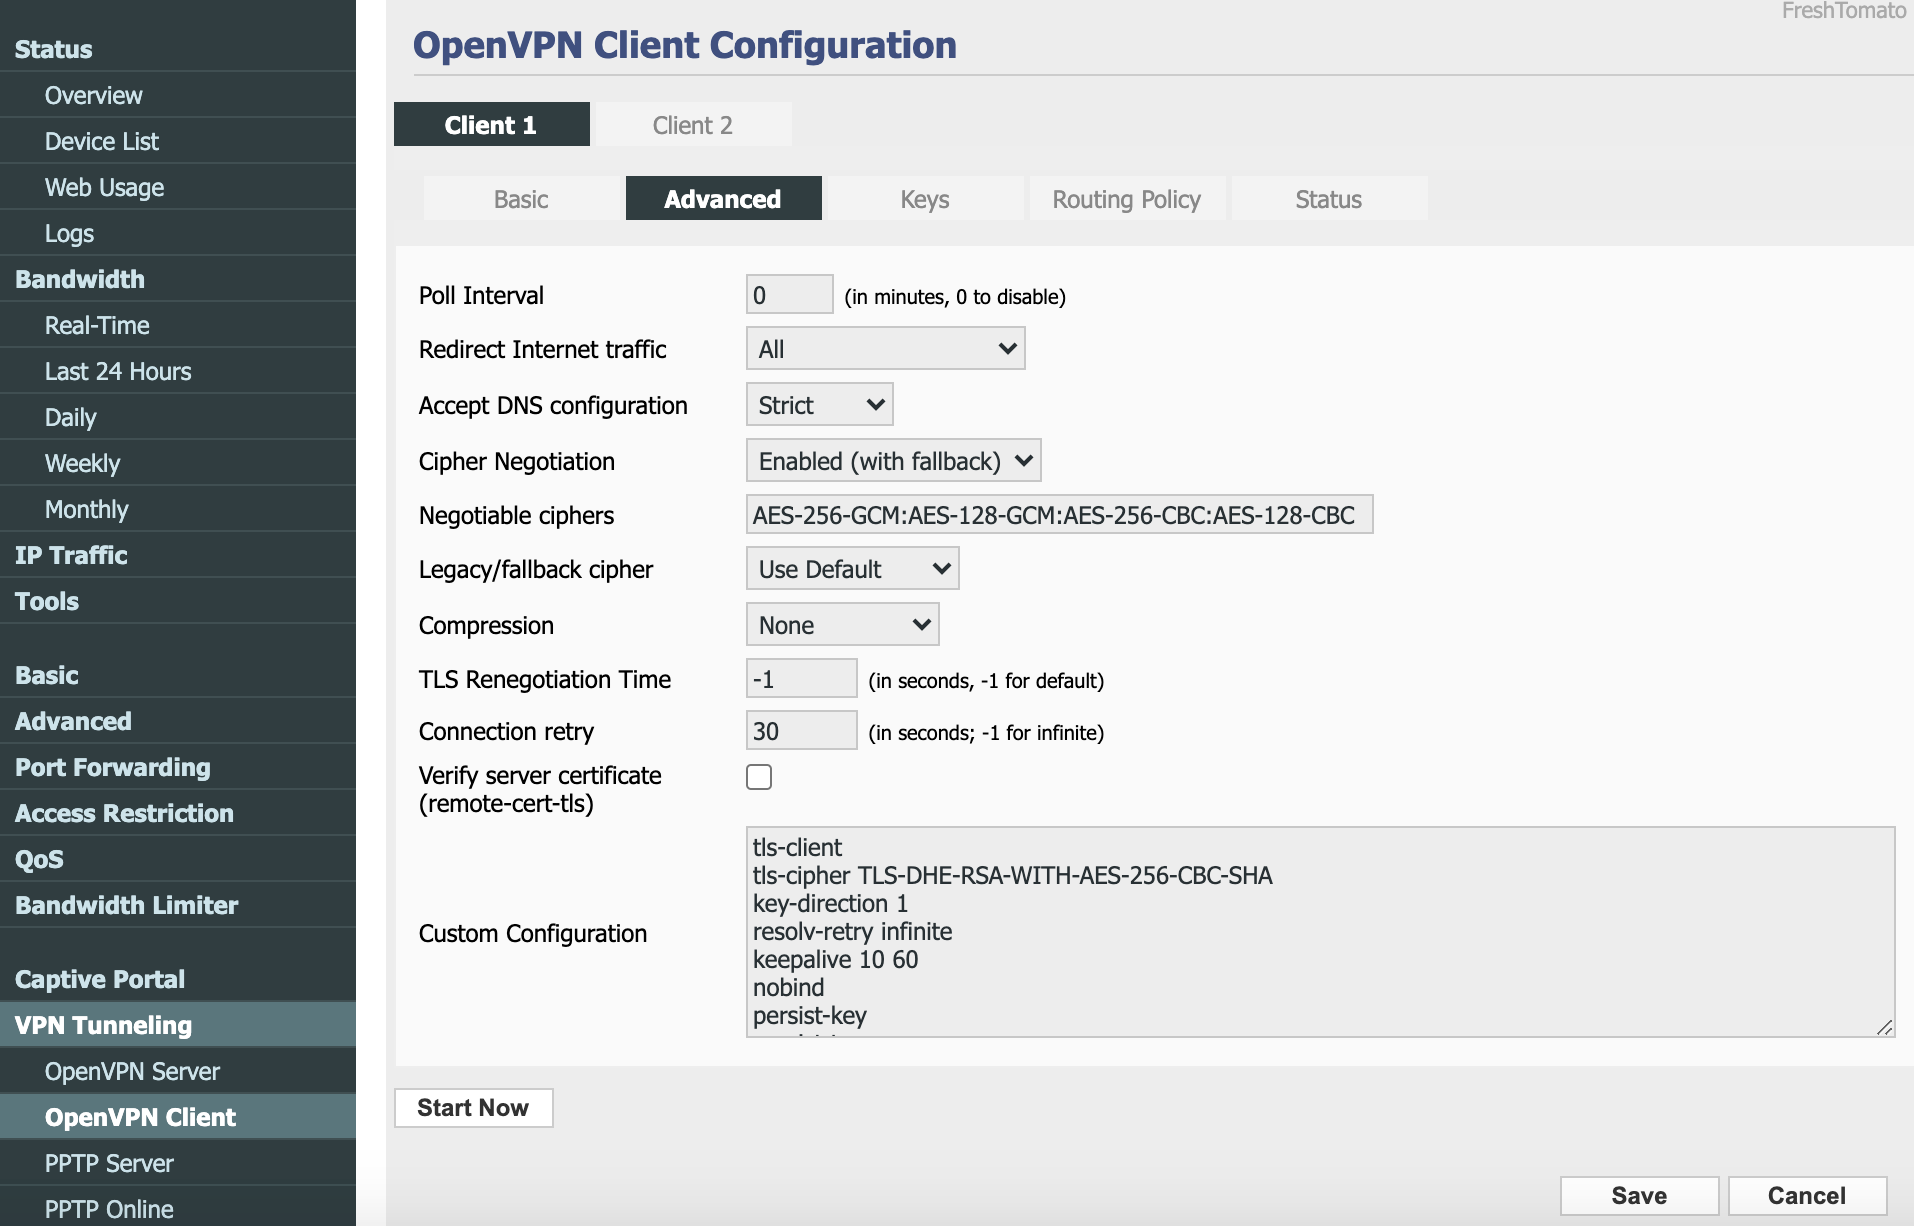
Navigate to
Advancedtab and enter the following configuration:-
Poll interval: 0
-
Redirect Internet traffic: All
-
Accept DNS configuration: Strict
-
Cipher Negotiation: Enabled (with fallback)
-
Negotiable ciphers: AES-256-GCM:AES-128-GCM:AES-256-CBC:AES-128-CBC
-
Legacy/fallback cipher: Use Default
-
Compression: None
-
TLS Renegotiation Time: -1
-
Connection retry: 30
-
Verify server certificate: Unchecked
-
Custom Configuration:
tls-client tls-cipher TLS-DHE-RSA-WITH-AES-256-CBC-SHA key-direction 1 resolv-retry infinite keepalive 10 60 nobind persist-key persist-tun persist-remote-ip verb 3 -
Click
Save.
-
-
Proceed to
Keystab > copy and paste Static Key and Certificate Authority into corresponding fields. ClickSave.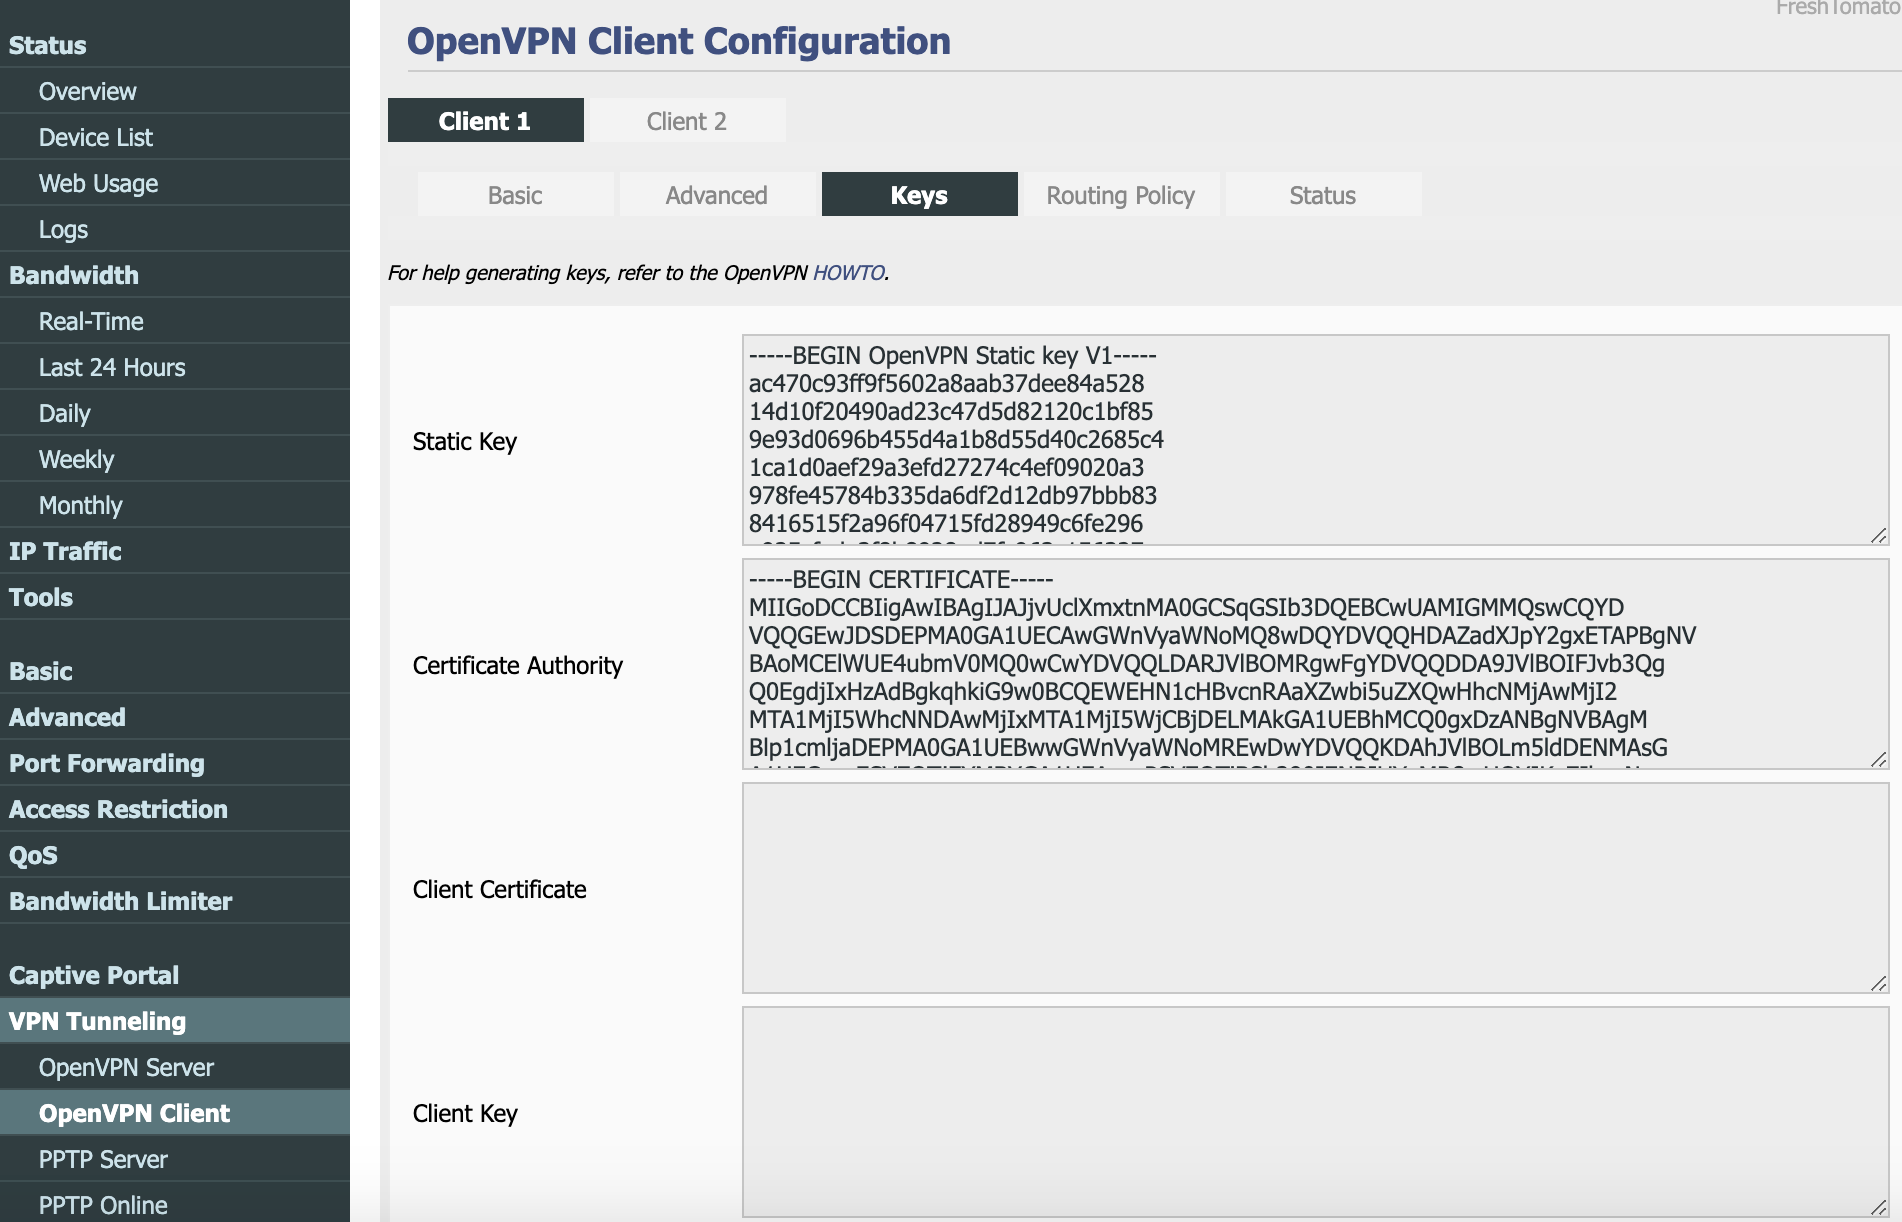
-
Navigate to
Statustab and click theStart Nowbutton to connect.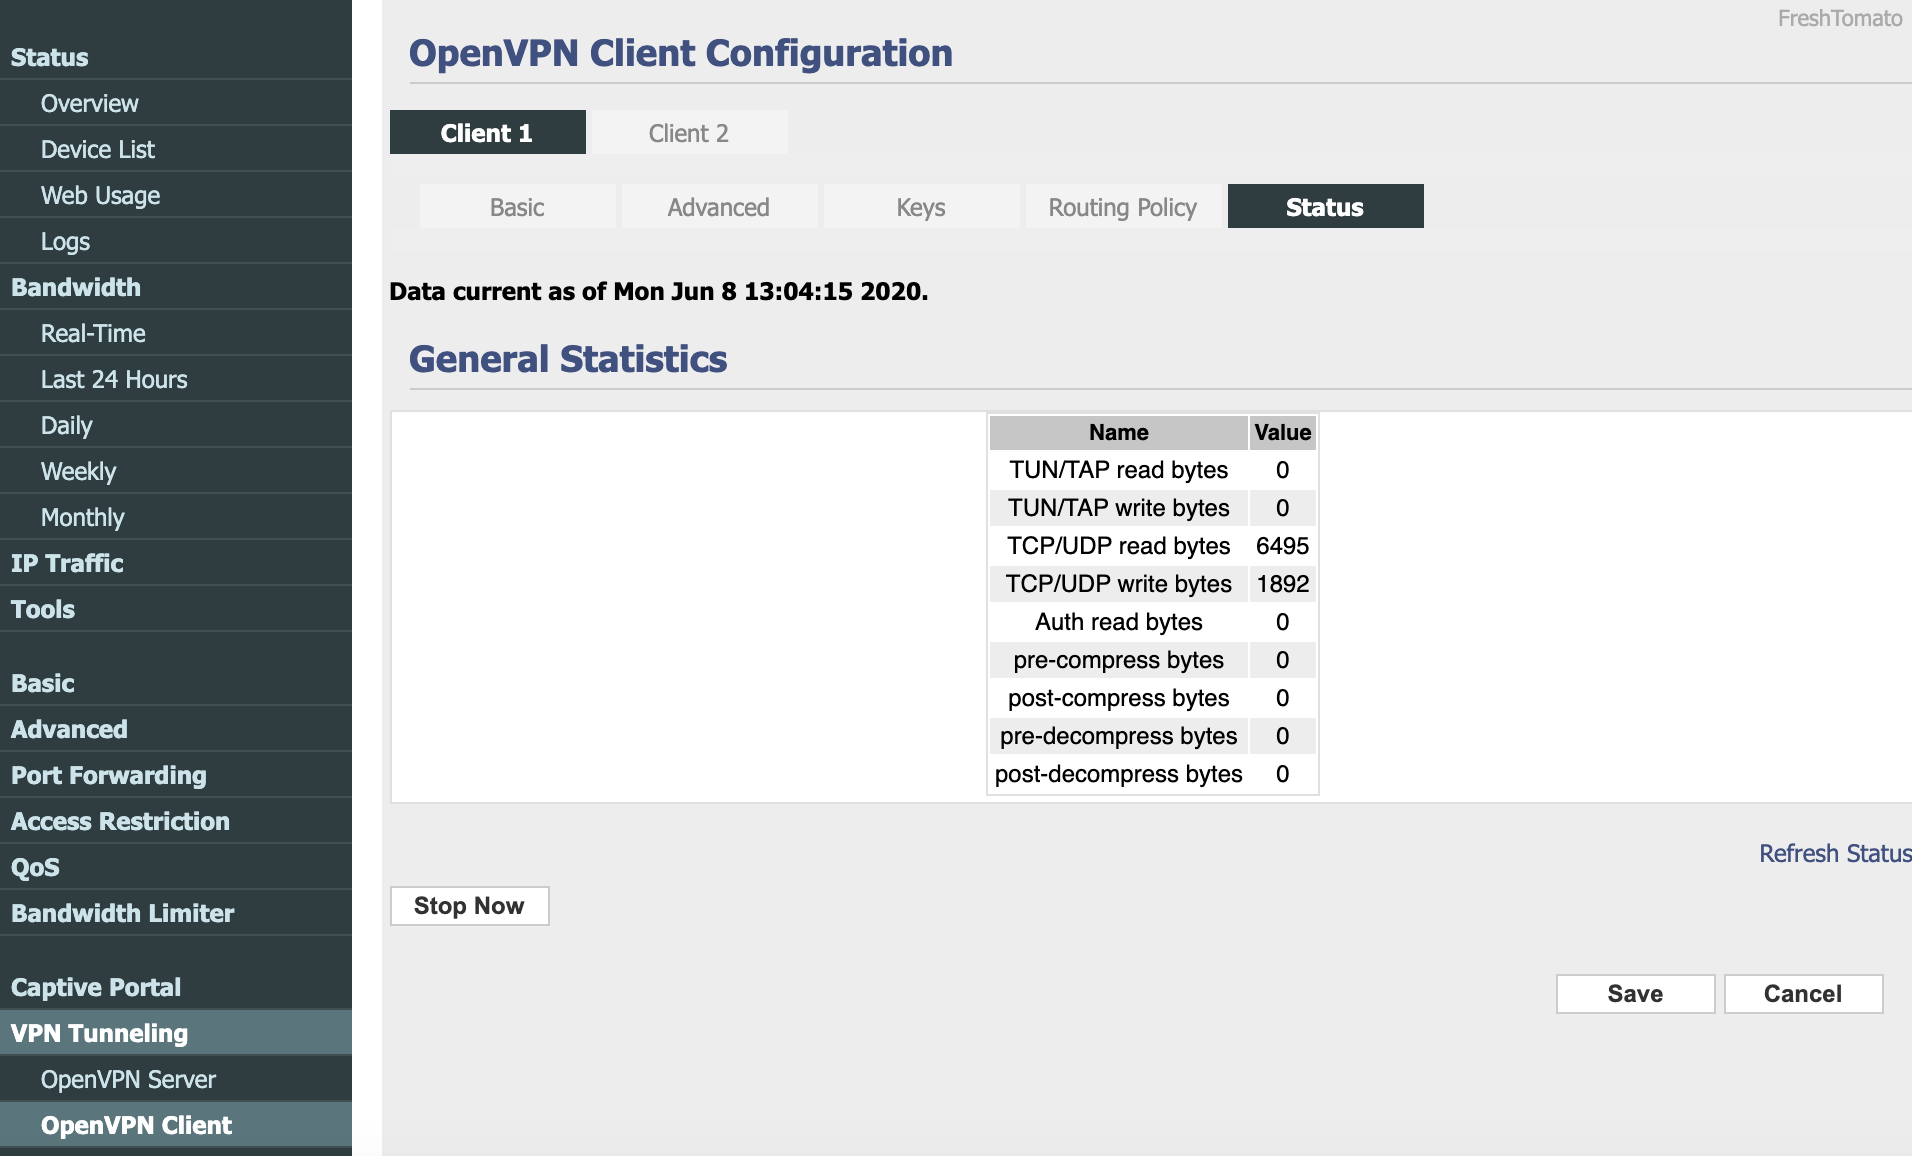
Configuring DNS
-
Navigate to
Basic-Network -
Specify one of the following DNS servers in the
DNS 1field:- 10.0.254.1 = redular DNS with no blocking
- 10.0.254.2 = standard AntiTracker to block advertising and malware domains
- 10.0.254.3 = AntiTracker Hardcore Mode to also block Google and Facebook
..and 198.245.51.147 in the
DNS 2field. -
Click
Save.
Configuring a Kill-Switch
- Navigate to
Administration>Scripts>Firewall - Enter the following:
iptables -I FORWARD -i br0 -o `nvram get wan_iface` -j DROP - Click
Saveand reboot your router.
Final steps
-
Reboot your router and wait for a minute or two for everything to settle, then reboot your computer system.
-
Check the assigned public IP address on our website and run a leak test at https://www.dnsleaktest.com from one of the devices connected to your Tomato router.
Please note: If you plan to use a Multi-hop setup please see this guide and replace the port number in Step 3 with the chosen Exit-hop server Multi-hop port.