Router Setup
OPNsense OpenVPN Setup Guide
Adding a CA certificate
-
In your router’s webUI, navigate to
System>Trust>Authoritiesand click on the+button. -
Give it any name, i.e. “IVPN CA”, select
Import an existing Certificate Authority, then copy and paste the contents of our ca.crt file into theCertificate Datafield. -
Click
Save.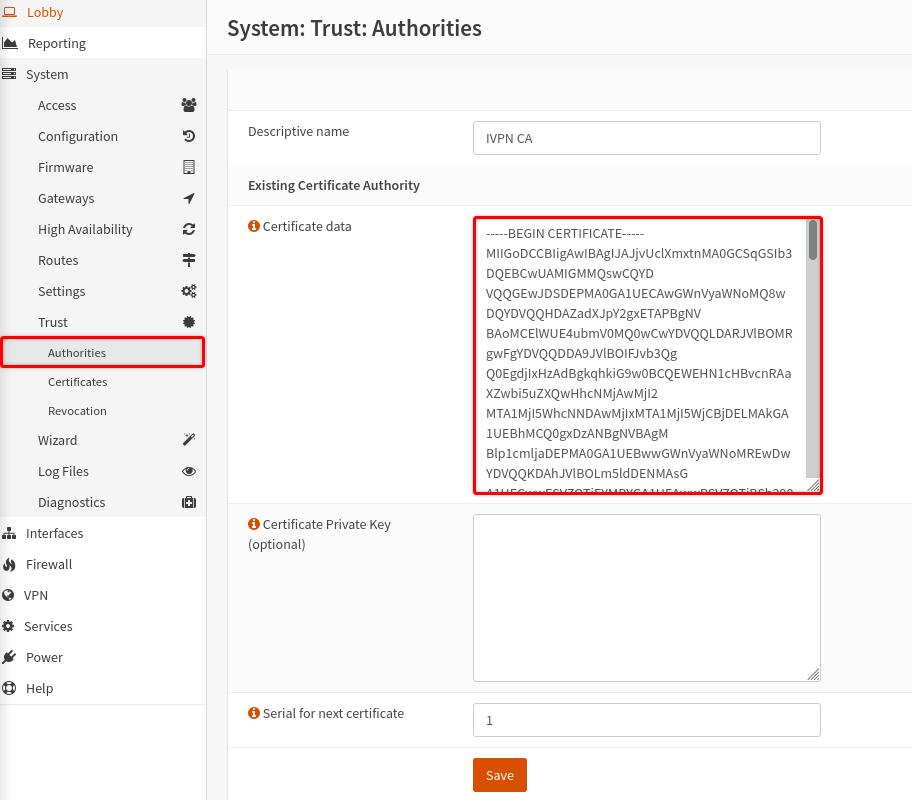
Adding a Static key
-
Navigate to
VPN>OpenVPN>Instances>Static Keystab and click on the+button. -
Give it any name, i.e. “IVPN TLS Key”, set
Modetoauth (Authenticate control channel packets), then copy and paste the contents of our ta.key file into theStatic Keyfield. -
Click
Save.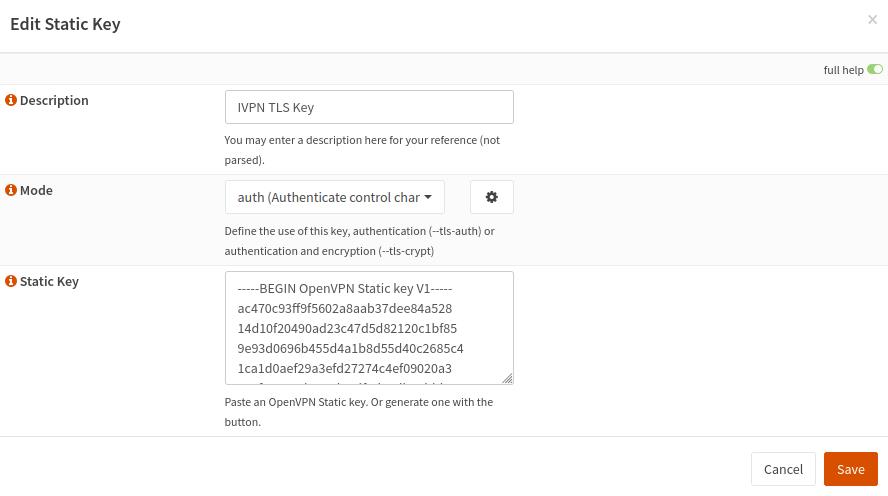
Creating an OpenVPN Client Instance
-
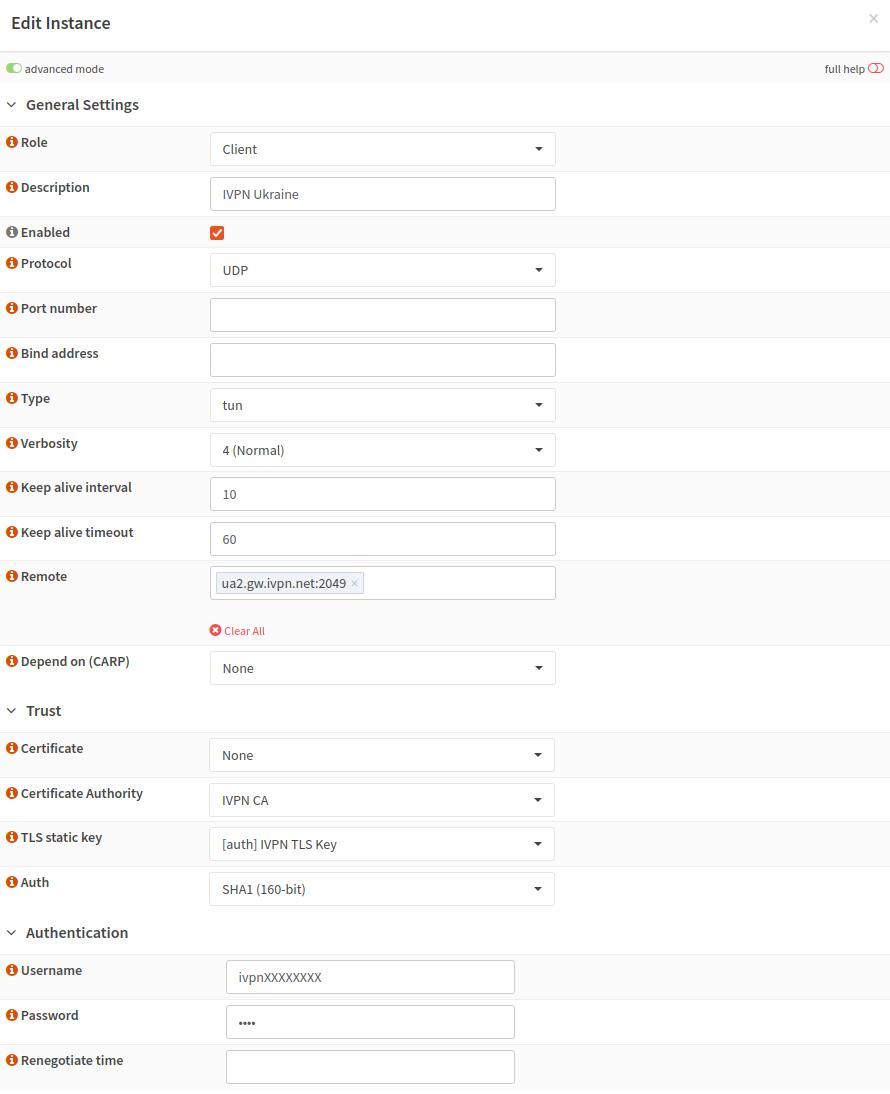
Navigate to the
Instancestab, click on the+button, toggle theAdvanced modeswitch on and enter the following configuration:- Role - Client
- Description - give it any name, i.e. IVPN Ukraine
- Enabled - Toggled on
- Protocol - UDP or TCP
- Type - tun
- Keep alive interval - 10
- Keep alive timeout - 60
- Remote - choose the server and enter its hostname with the port number separated with a colon, e.g.
ua2.gw.ivpn.net:2049(available ports can be found here) - Certificate Authority - IVPN CA
- TLS static key - [auth] IVPN TLS Key
- Auth - SHA1 (160-bit)
- Username - your IVPN account ID (i-XXXX-XXXX-XXXX or ivpnXXXXXXXX. Note, the ID is case-sensitive)
- Password - any string, i.e. ivpn
-
Click
Save.
Creating an Interface
-
Navigate to
Interfaces>Assignments -
Look for the interface with
ovpnc1name, give it any description, i.e. “IVPNUkraine”, then click on the+button andSave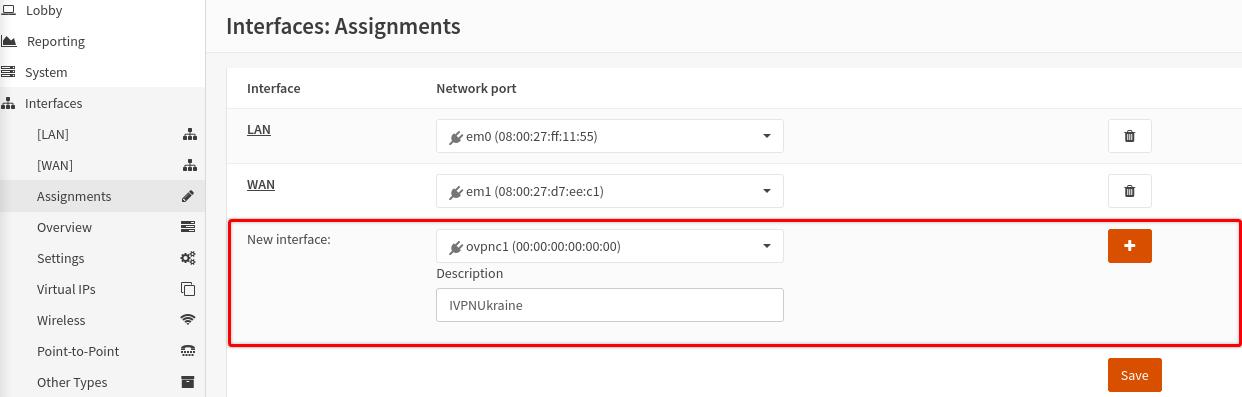
-
Click on the newly added interface name, have the
Enable Interfaceoption checked andSavethe changes.
Configuring a Firewall
-
Navigate to
Firewall>NAT>Outbound, selectManual outbound NAT rule generationand clickSave -
Click on the
+button to add a new rule and fill in the following configuration:- Disabled - Unchecked
- Interface - select the created earlier interface, i.e. IVPNUkraine
- Source Address - LAN net
- Translation / target - Interface address
-
Delete the other rule(s) containing your local network subnet that exist via WAN. This will ensure that traffic does not leak if the VPN tunnel accidentally goes down.
-
Click
SaveandApply Changes.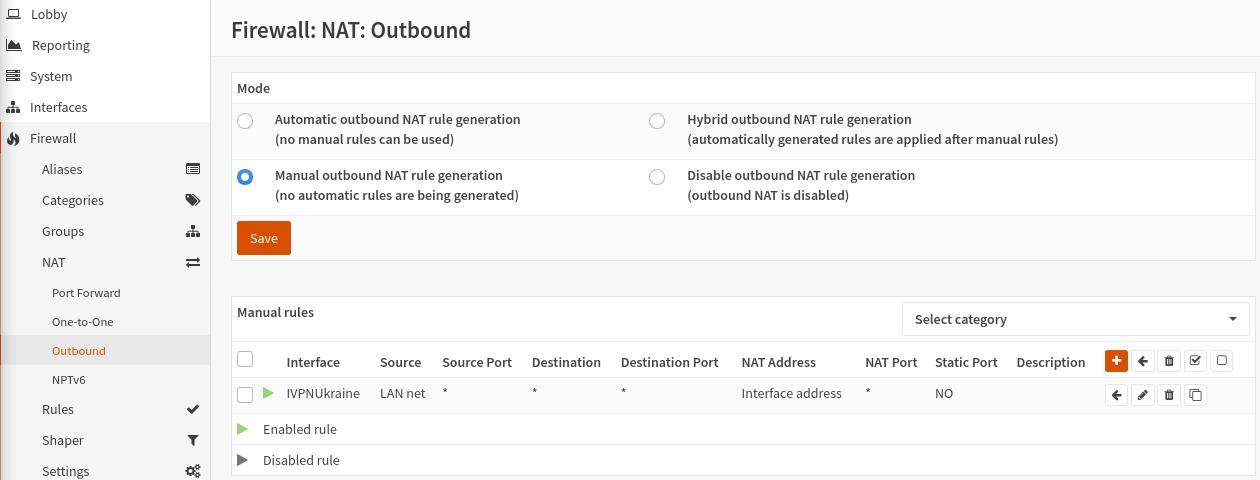
DNS
-
Navigate to
Services>ISC DHCPv4>[LAN] -
In the
DNS serversfield, enter the OpenVPN regular DNS server IP address (10.0.254.1) or the one associated with the preferred AntiTracker list. -
Click
Save.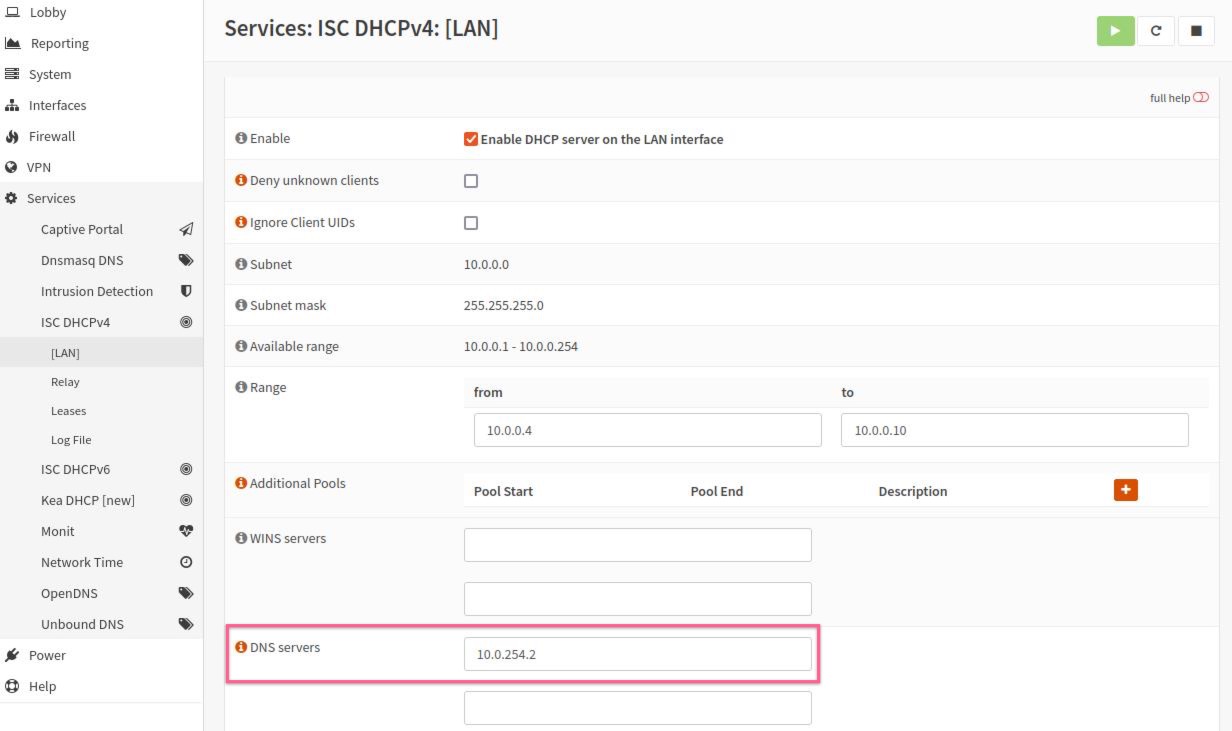
Final Steps
-
Restart your router and check the status of the OpenVPN client in the
VPN-OpenVPN-Connection Statusarea.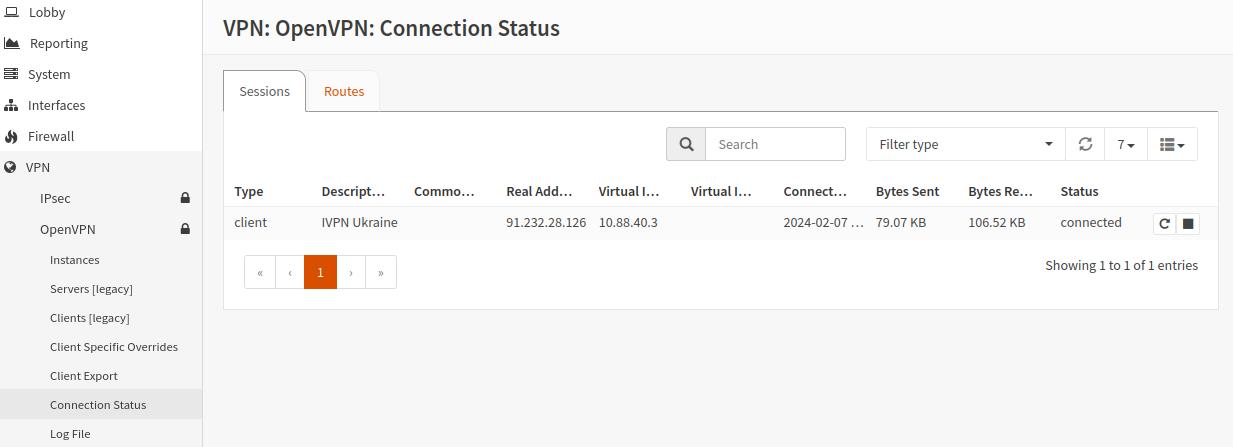
-
Check the conenction status and the assigned public IP address on our website and run a leak test at https://www.dnsleaktest.com from one of the devices connected to your OPNsense router.

Please note: If you plan to use a Multi-hop setup please see this guide and replace the port number in Configuring an OpenVPN Client section, Remote field with the chosen Exit-hop server Multi-hop port.