NAS Setup
QNAP NAS Setup Guide
-
Download and extract the IVPN .ovpn config files to your computer system.
-
In the QNAP web interface, open the
AppCenterand search for qvpn.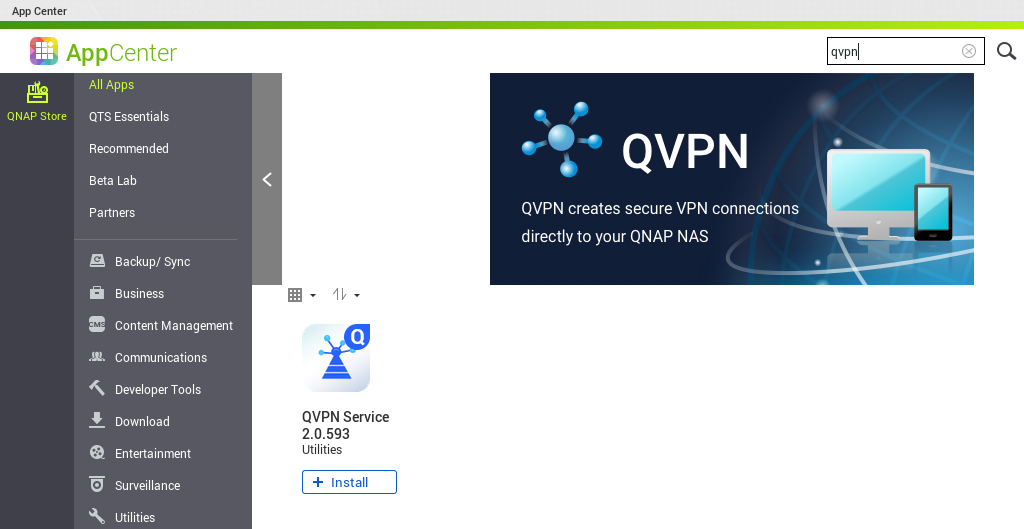
-
Click the
+ Installbutton to add theQVPN Serviceapp to your device if it is not installed already. -
Open the
QVPN Serviceapp and under the theVPN Clientarea, clickVPN Connection Profiles. Click theAddbutton and chooseOpenVPN.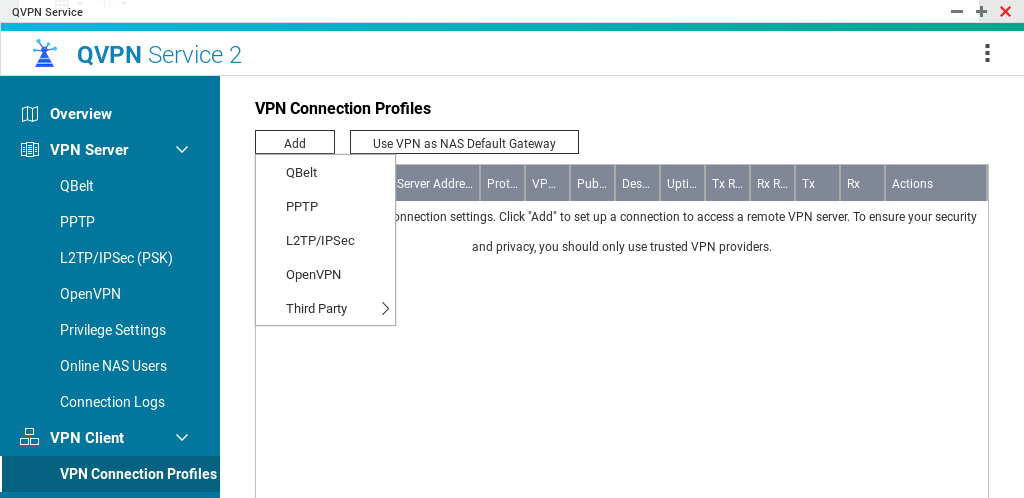
-
Use the file picker dialogue box to choose the VPN server location you prefer and click
OK. -
Enter your account ID that begins with letters ‘ivpnXXXXXXXX’ or ‘i-XXXX-XXXX-XXXX’ and any password in the credential fields and (optionally) change the Profile Name to something different. Click the
Applybutton.Only your account ID is used for authentication and is case-sensitive. The password field can be left empty or set to anything if your client software requires a non-blank password.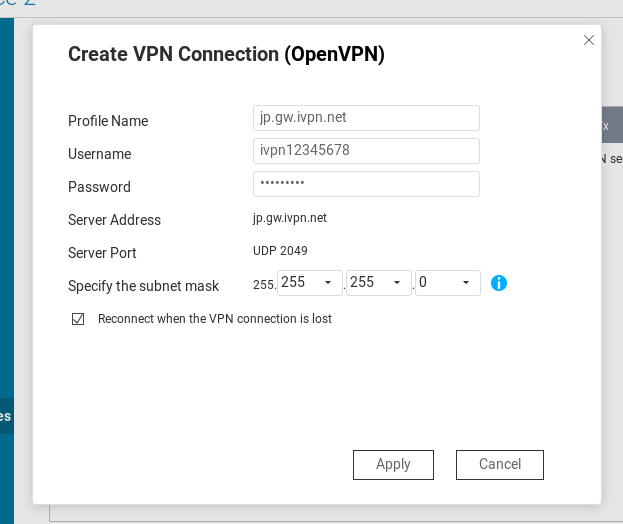 Note: You are free to choose whichever server location you prefer. Our Japan server is used here only as an example.
 -
Add as many VPN server profiles as you would like.
-
Click the
Connecticon under theActionscolumn. The connection may take 10 to 30 seconds and theStatusindicator will turn green when the connection is successful.
-
Click the
Use VPN as NAS Default Gatewaybutton for extra settings related to the default gateway and failover.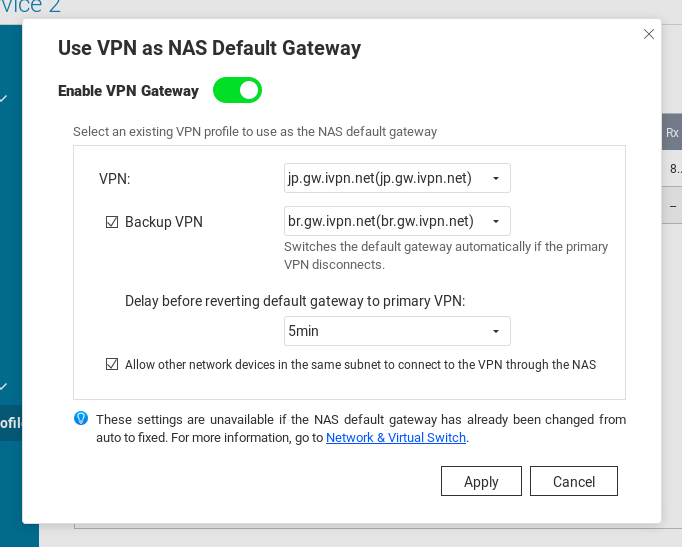 If you check the
Allow other network devices in the same subnet to connect to the VPN through the NASoption, change the default gateway on your computer system to the local network IP address of the QNAP device to route all of the Internet traffic on your computer through the NAS VPN.
Use our standard DNS server 10.0.254.1, our AntiTracker DNS 10.0.254.2, or our Hardcore Mode AntiTracker 10.0.254.3 on your computer system to complete the routing setup.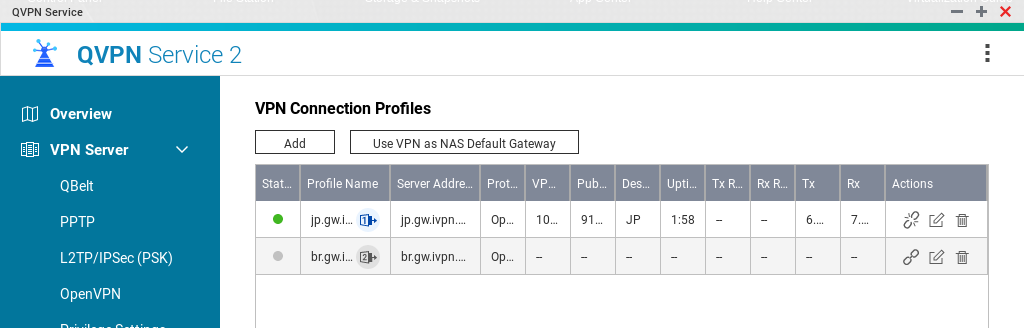
-
Instead of using servers separated by a great distance, you might prefer to use a location with multiple servers. This may offer a more seemless and familiar network experience if failover occurs:
ca1.gw.ivpn.net
ca2.gw.ivpn.net
de1.gw.ivpn.net
de2.gw.ivpn.net
us-ga1.gw.ivpn.net
us-ga2.gw.ivpn.net
You will have to make a copy of the .ovpn file and edit the server hostname prior to importing both files. Any text editor, like WordPad or TextEdit, will handle the editing. The server hostname is on line 4.
Our server status page lists all of our servers.