NAS Setup
Synology NAS Setup Guide for DSM v.6.1
The following guide explains how to set up your Synology NAS based on DiskStation Manager (DSM) v.6.1.
-
Download and extract the archive with our .ovpn config files.
-
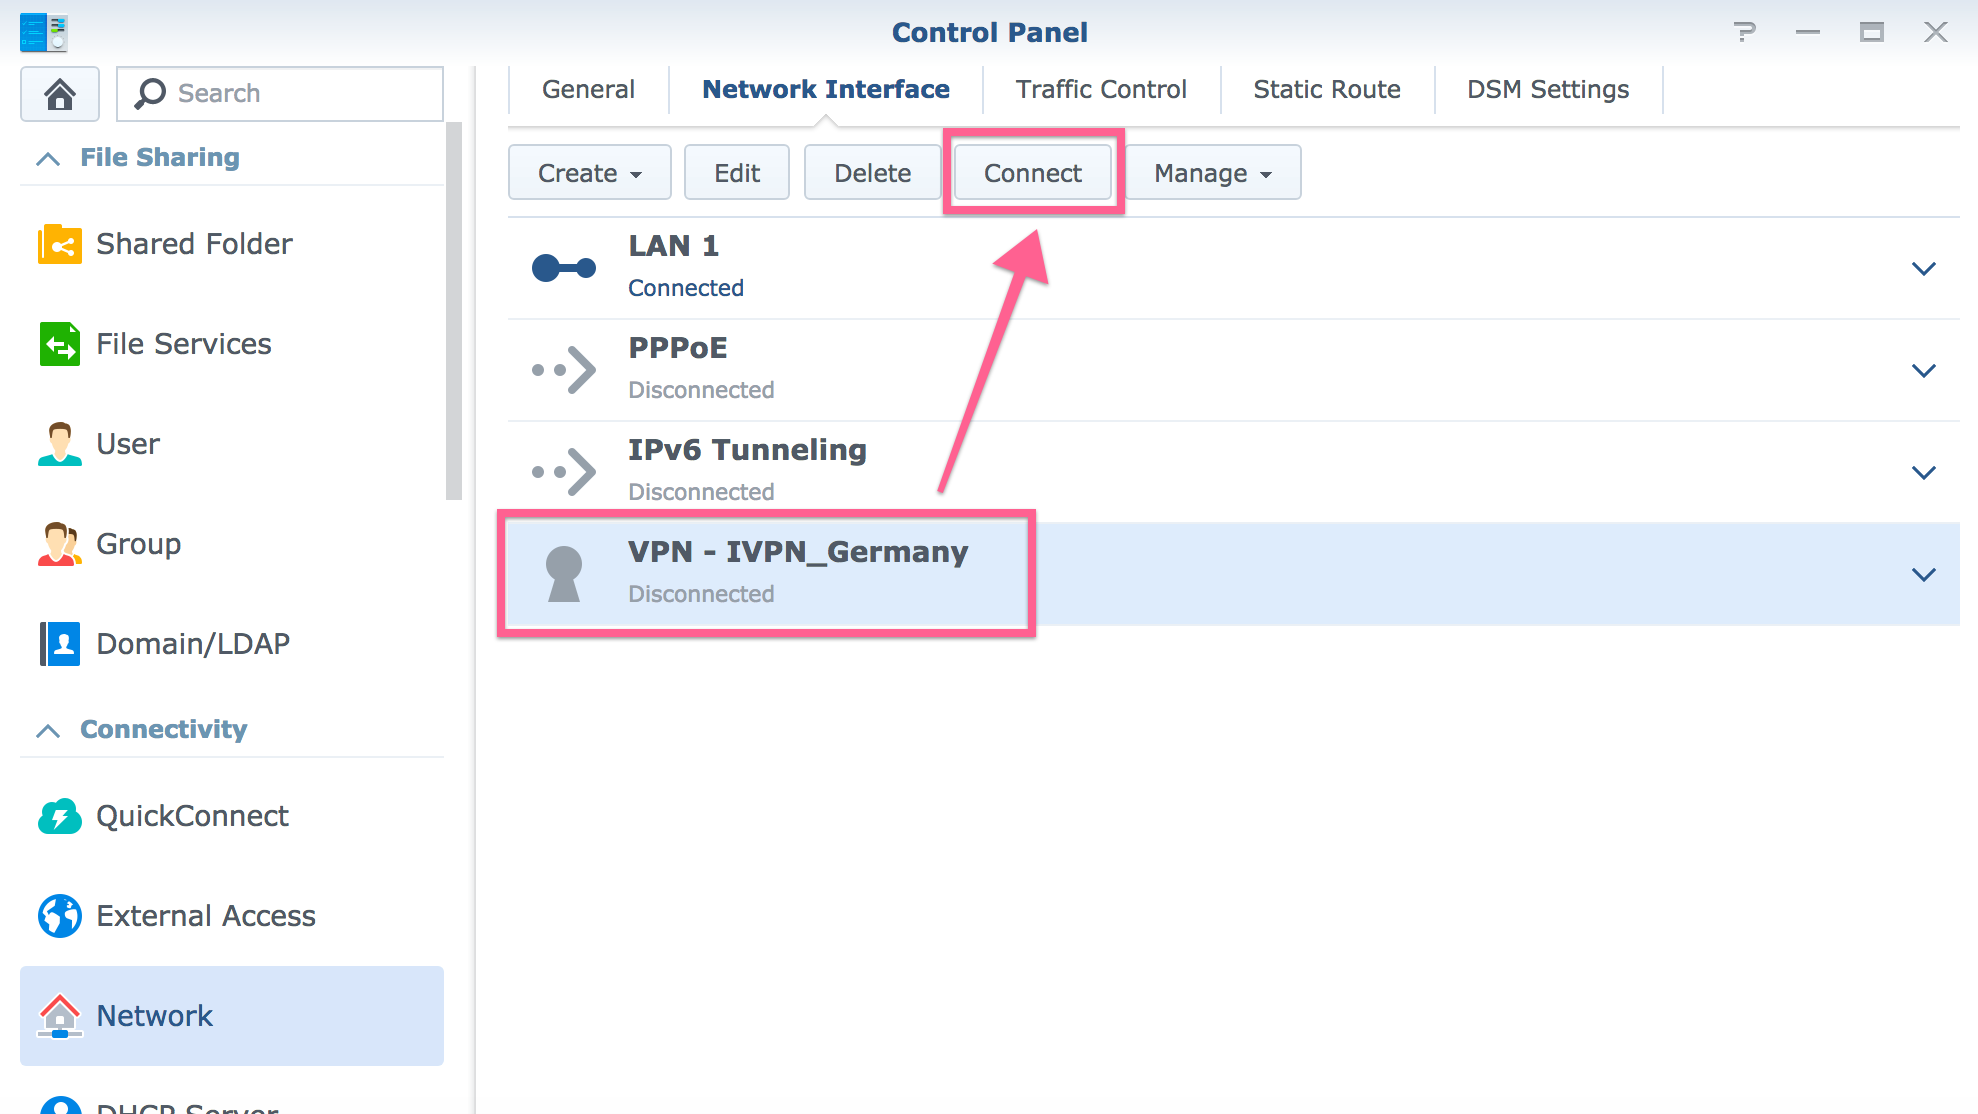
Log into your Synology device, navigate to
Control Panel-Network-Network Interface& click on theCreate-Create VPN Profile.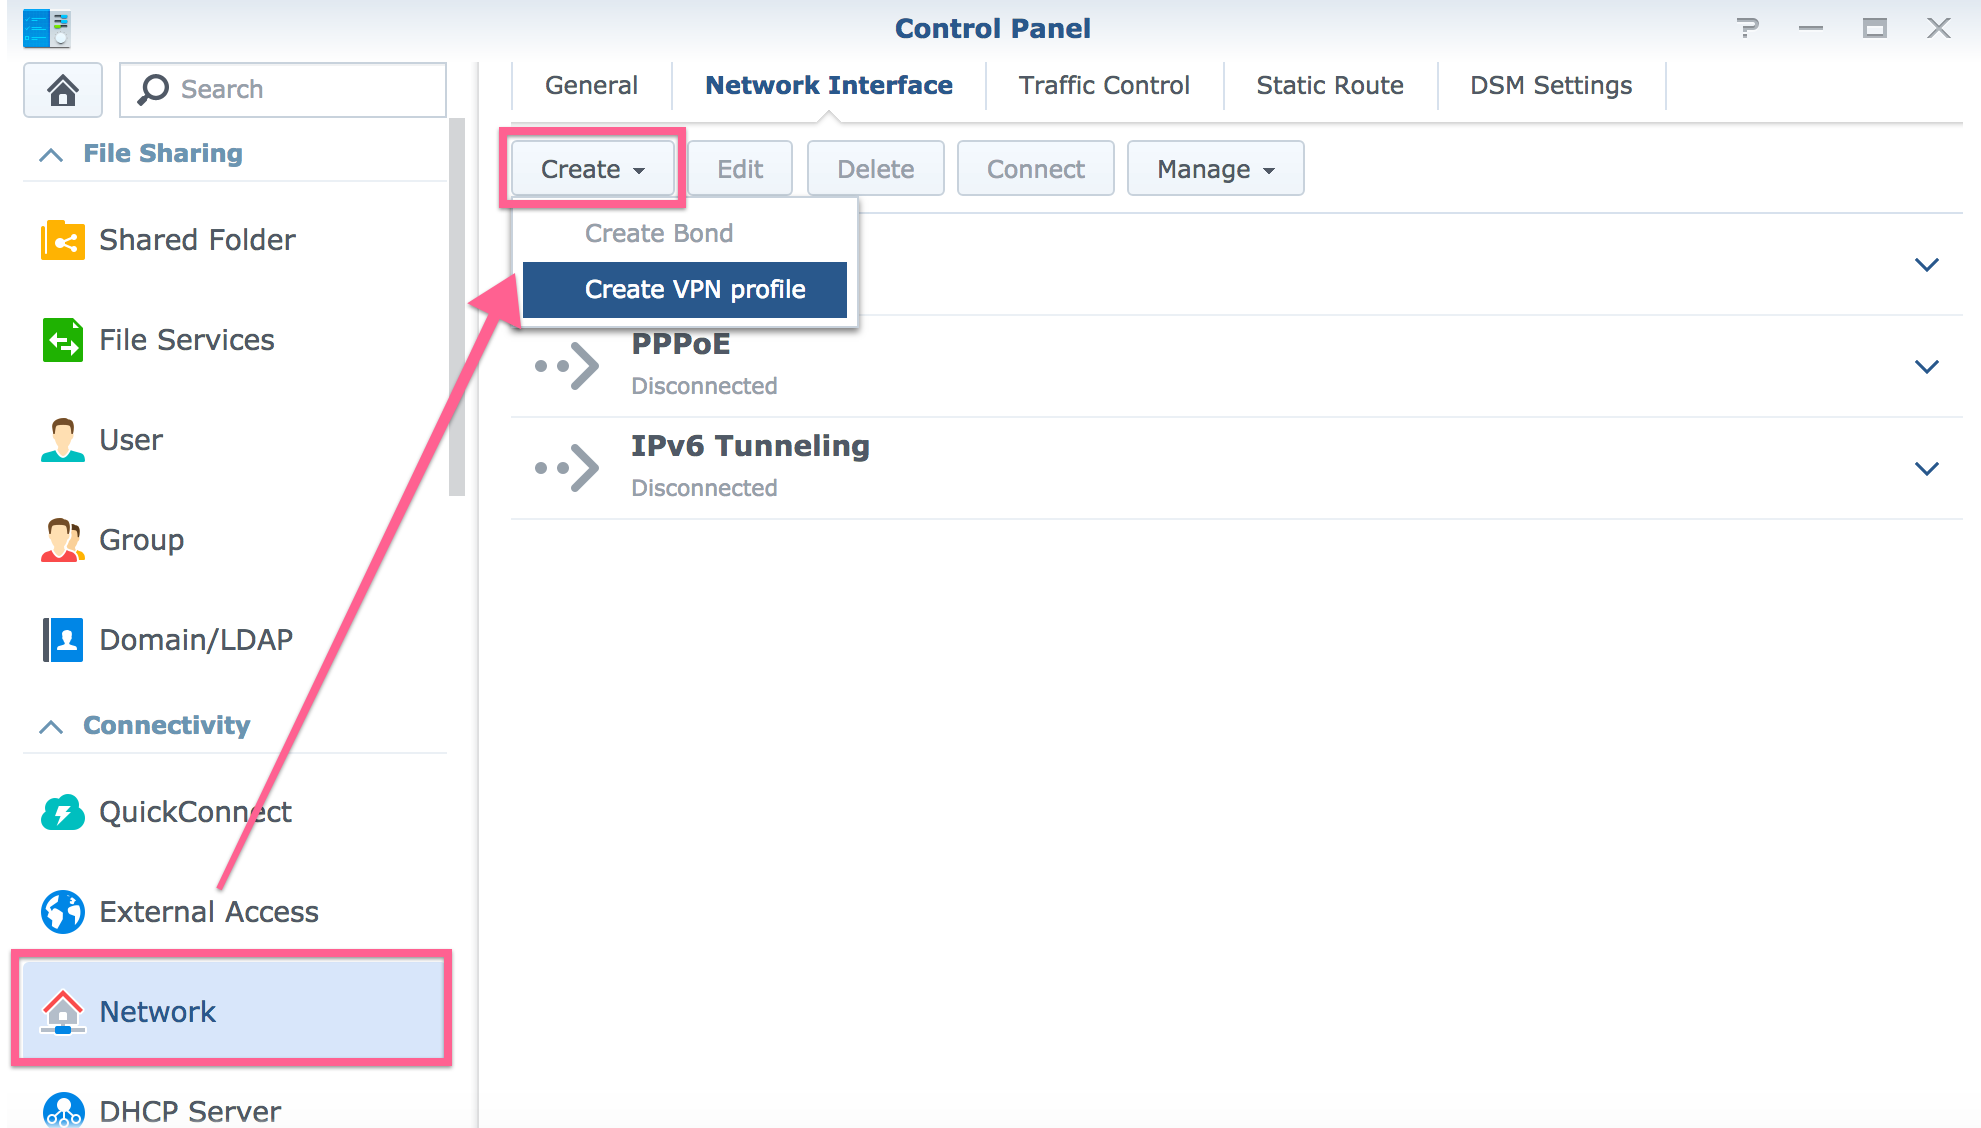
-
Choose
OpenVPN (via importing a .ovpn file)& click onNext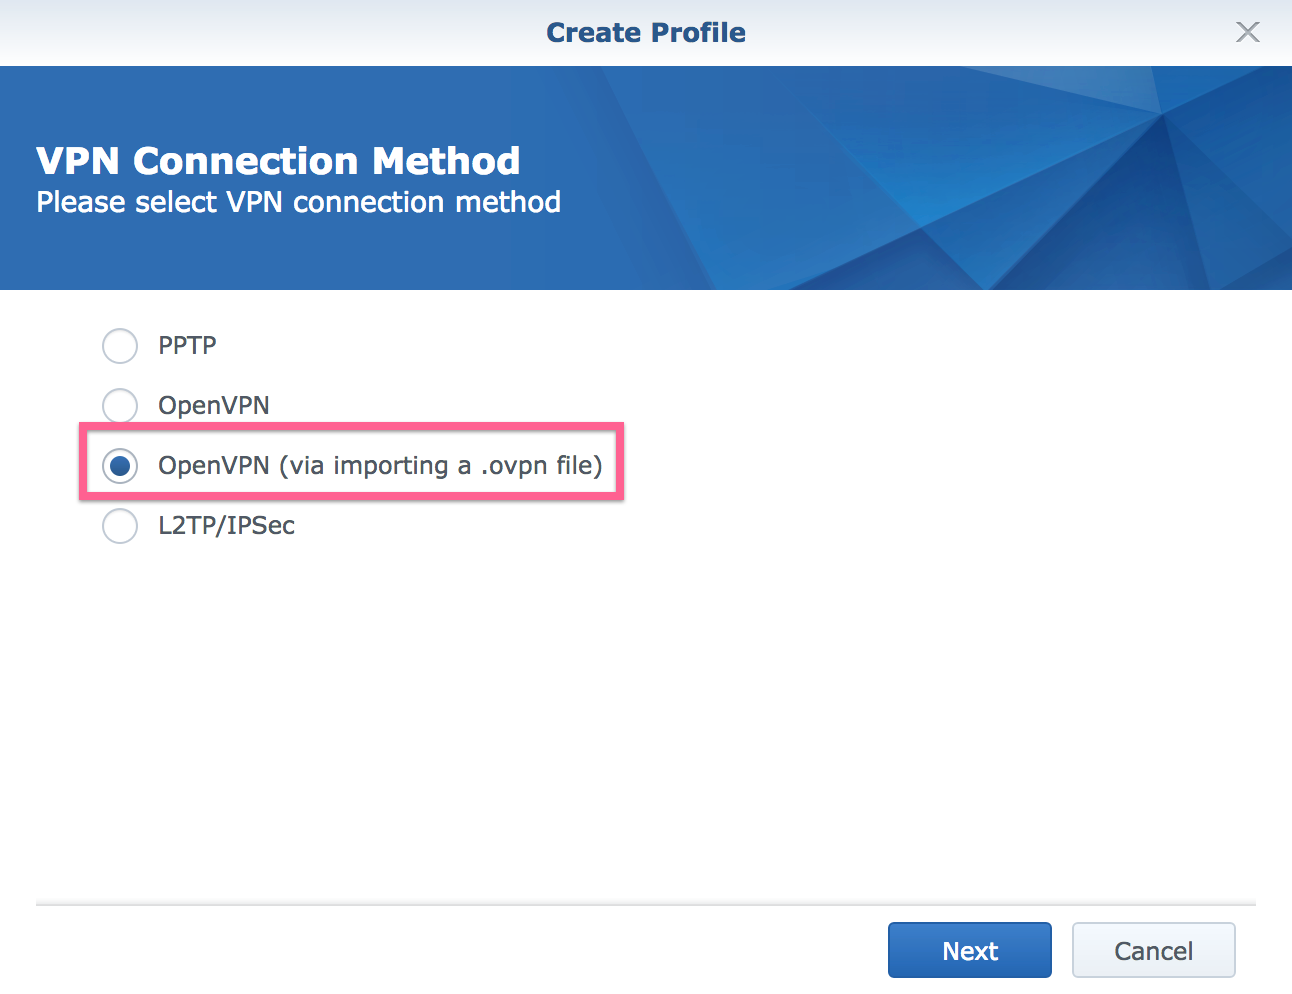
-
Fill in the following fields:
Profile name - Give it any name you want, e.g. IVPN_Germany.
User name - Your account ID that begins with letters ‘ivpnXXXXXXXX’ or ‘i-XXXX-XXXX-XXXX’.
Password - Any password.Only your account ID is used for authentication and is case-sensitive. Enter anything into the password field. !IMPORTANT! The password field cannot be left empty.Import .ovpn file - specify the location of the VPN profile file you adjusted in the first step.
ClickNext.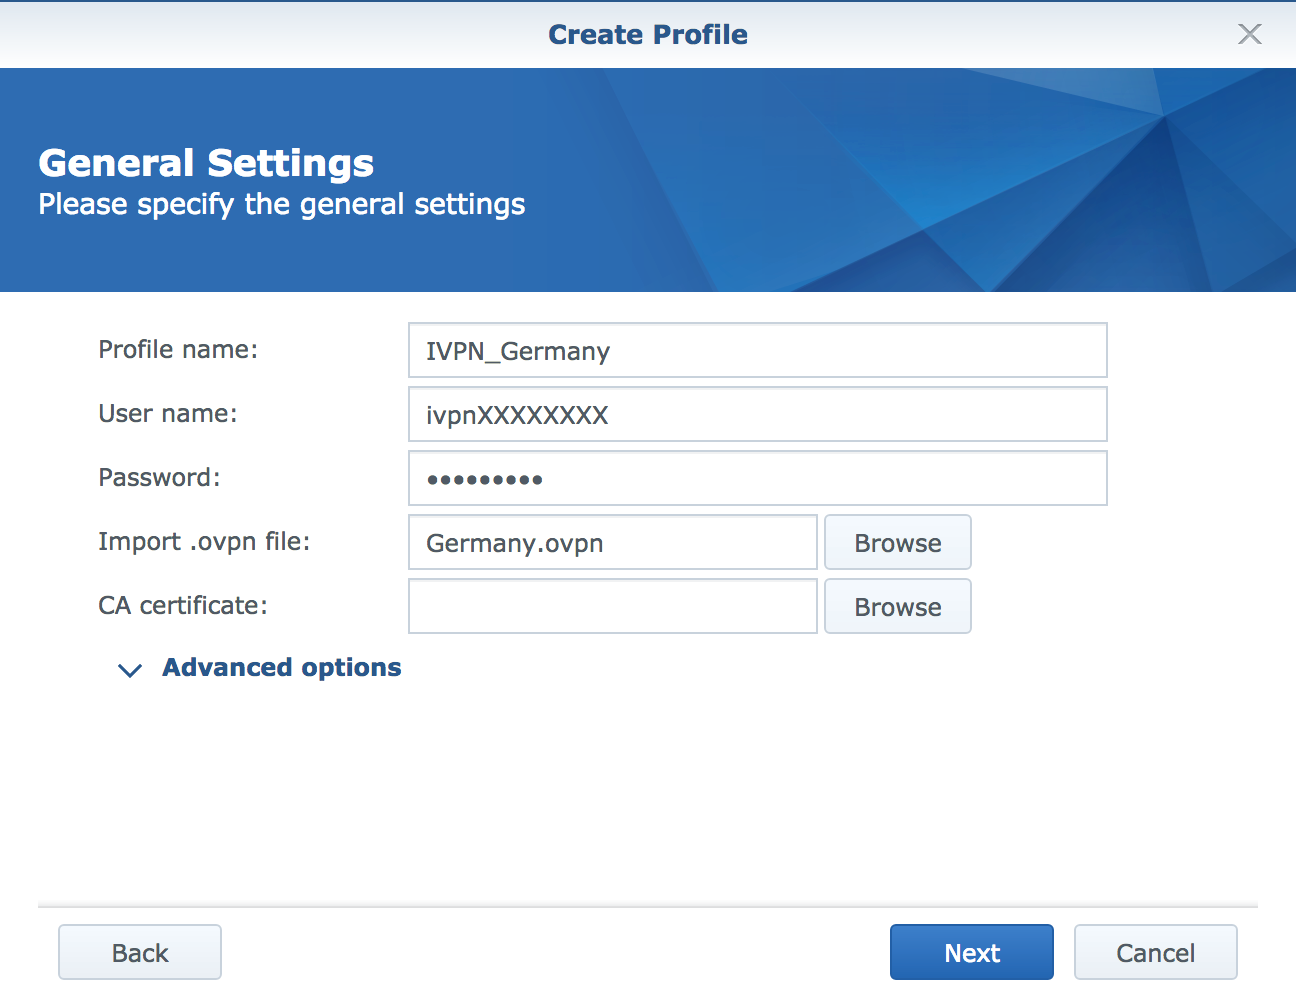
-
We recommend enabling all options in the Advanced Settings:
Use default gateway on remote network- enable this option to route the network traffic of the Synology NAS to the specified VPN server.
Allow other network devices to connect through this Synology server's Internet connection- enable this option to allow network devices that are within the same local network as your Synology NAS to connect to the same VPN server.
Reconnect when the VPN connection is lost- if the VPN connection is unexpectedly lost, the system will attempt to reestablish the connection five times, attempting once every 30 seconds.
ClickApply.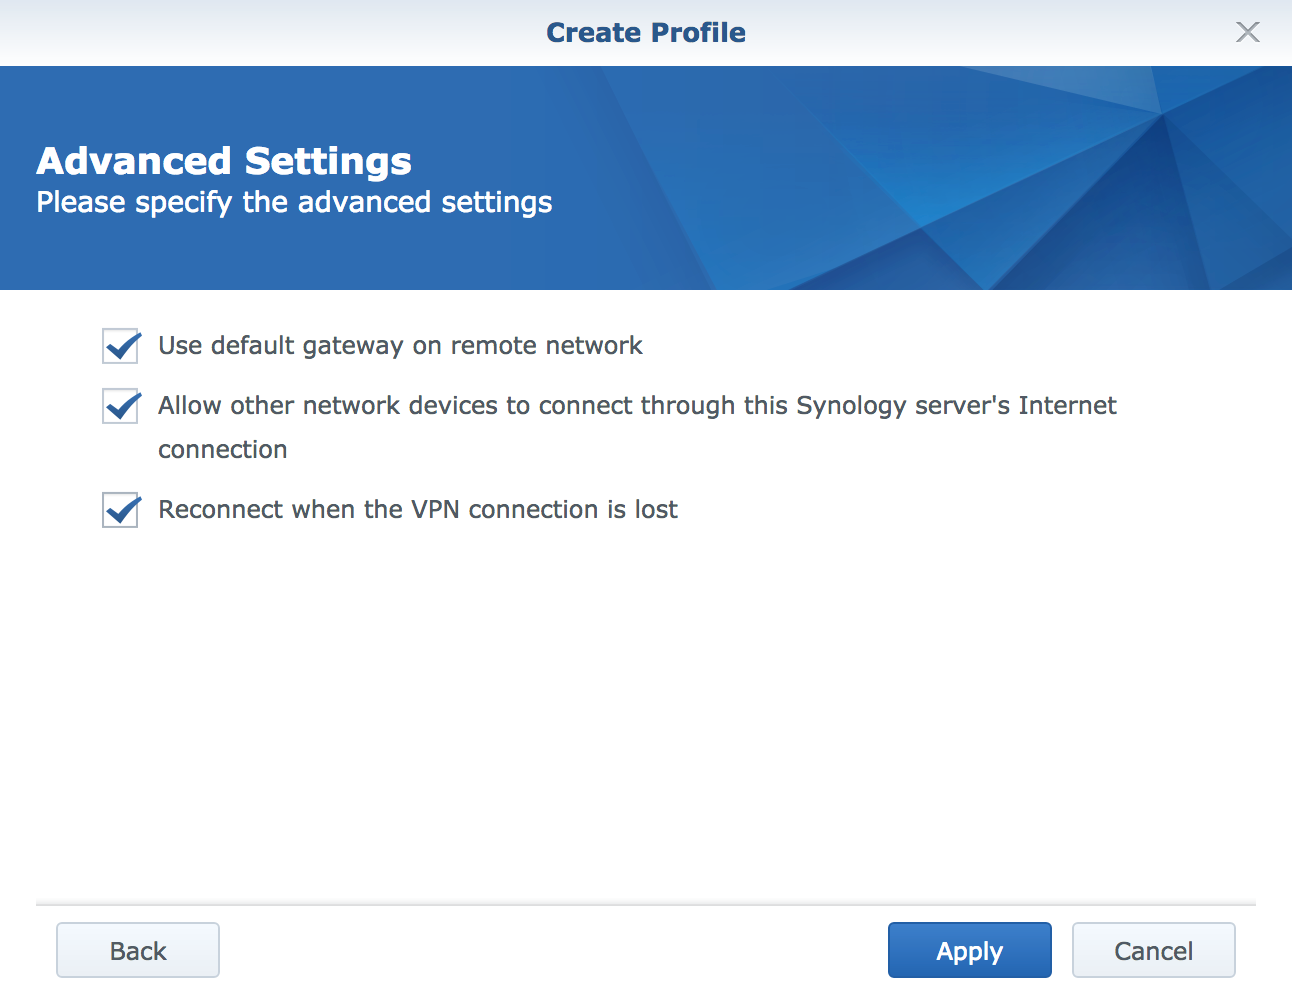
-
The VPN profile is now successfully created. You can now manage your tunnel with
Connect/Disconnectbutton.