IPSec with IKEv2 setup guide for Windows 10
This guide will help you set up an IPSec connection using IKEv2
-
Open the
Control panelby clicking the start menu icon and typing control -
Click
Network and Internetfollowed byNetwork and Sharing Centre -
Click
Setup a new connection or network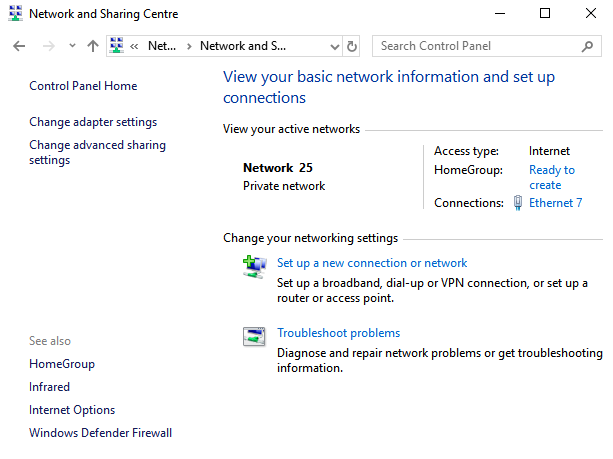
-
Click
Connect to a workplace, then clickNext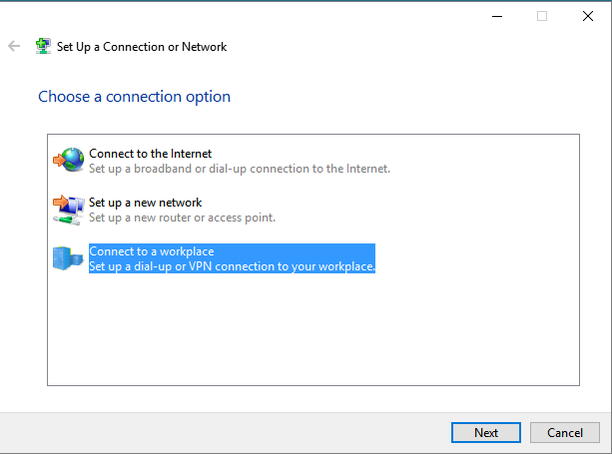
-
Click
Use my Internet connection (VPN)
-
Enter the address of one of the servers from the server status list (depending on which country you want to connect to).
Below that give the connection a name e.g. IVPN - GB.
Choose
Remember my credentialsif you don’t want to enter your account ID and password every time you connect.Click
Createto continue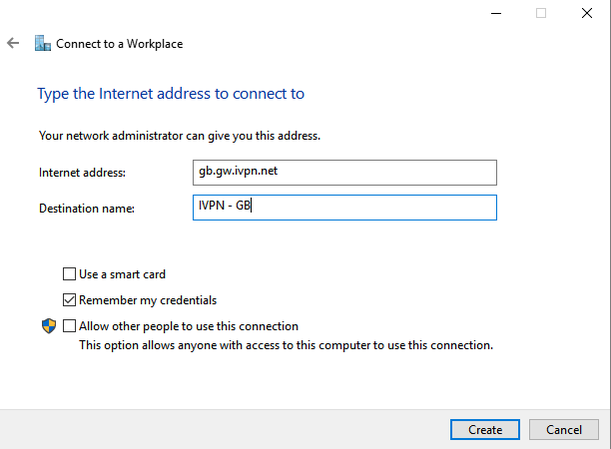
-
The VPN connection is now created but we still need to configure it. Open the
Network and Sharing Centreas shown in steps 1 and 2.Click
Change Adapter settings
-
Right click the icon with the name of the connection you created and with the text WAN Miniport (IKE v2)
-
Below it and click
Properties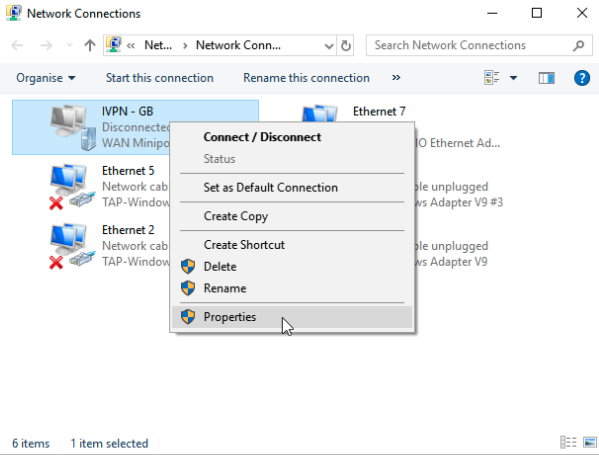
-
Select the
Securitytab and change the Type of VPN toIKEv2and the data encryption toMaximum strength encryption (disconnect if server declines)Under
AuthenticationselectUse Extensible Authentication Protocol (EAP)andMicrosoft: Secured password (EAP-MSCHAP v2) (encryption enabled)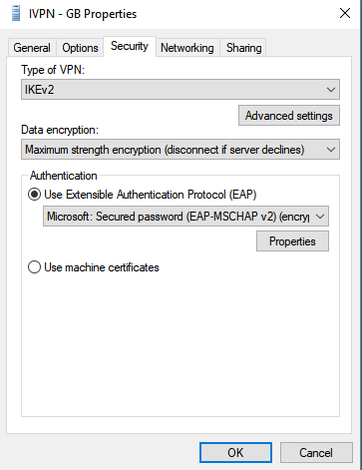
-
Right click the icon with the name of the connection you created again and select
Create shortcut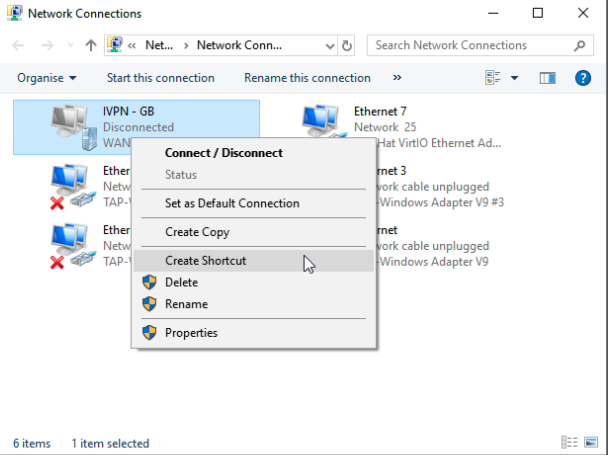
-
Click
Yesto create a shortcut on the desktop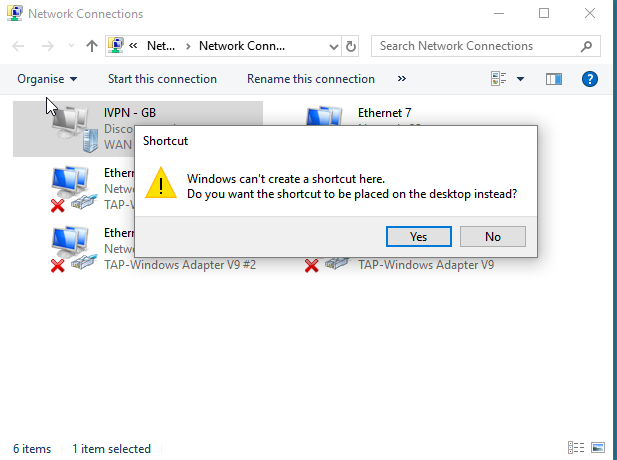
-
Search for
VPN settingsin the search field on the Taskbar or in the Start menu. ClickVPN settingsin the results list.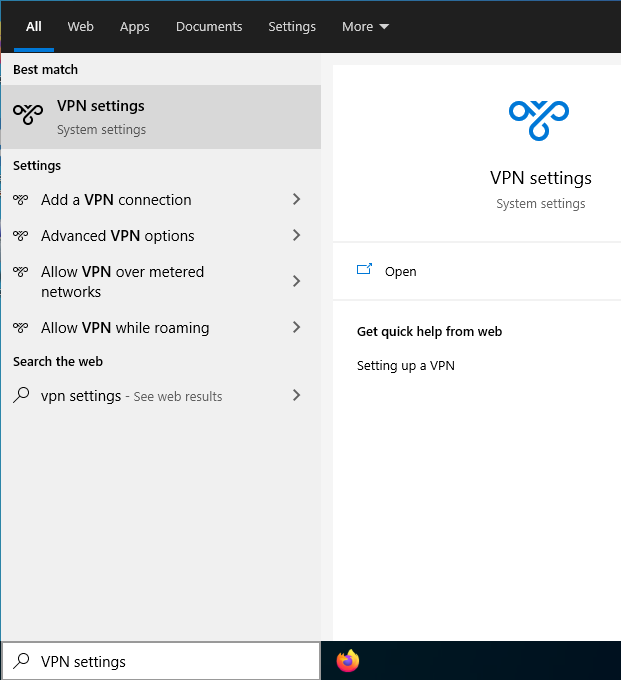
-
Click the VPN connection created in step #6 above and click the
Advanced optionsbutton.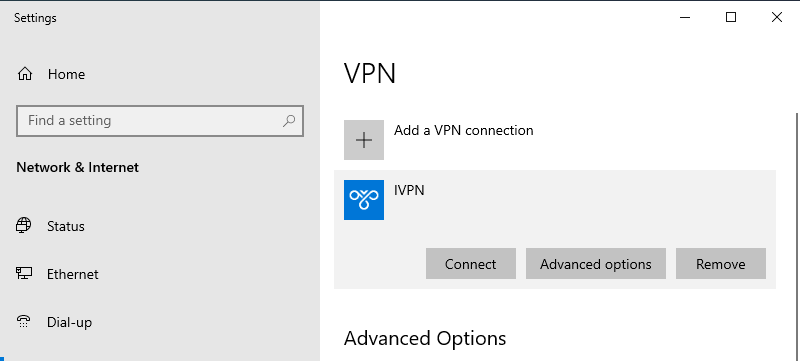
-
Under
Connection properties, click theEditbutton.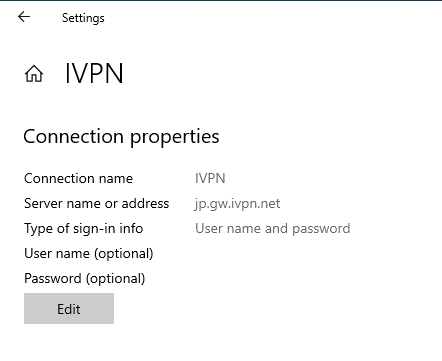
-
Enter your account ID that begins with letters ‘ivpnXXXXXXXX’ or ‘i-XXXX-XXXX-XXXX’ (case-sensitive) and the following password -
ivpn, then click theSavebutton. Close all of the windows that have been opened during this process.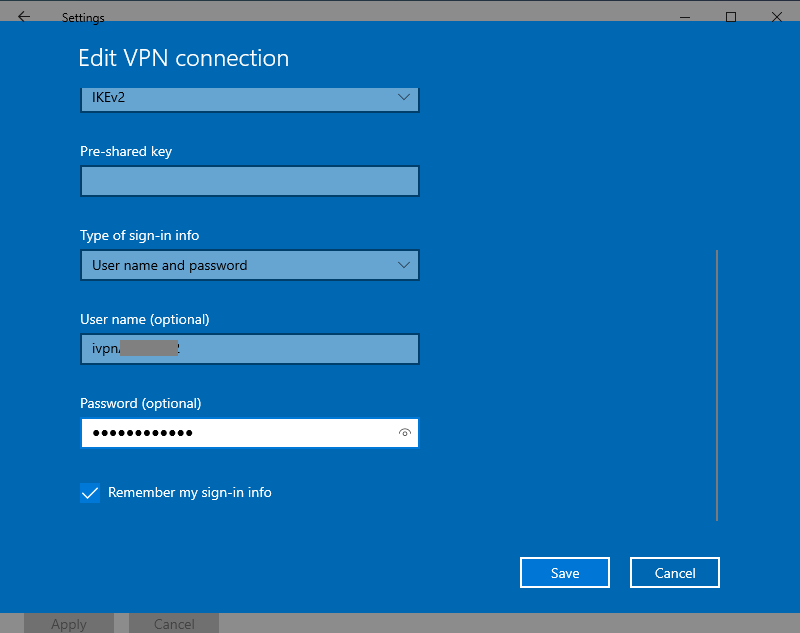
-
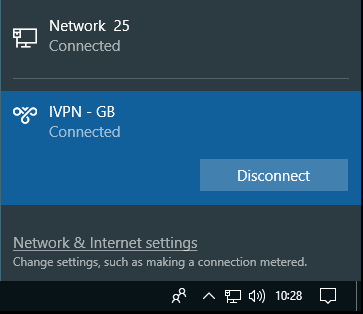
To Connect, click your
Task Bar Network Icon, then click the name of theIVPNconnection and thenConnect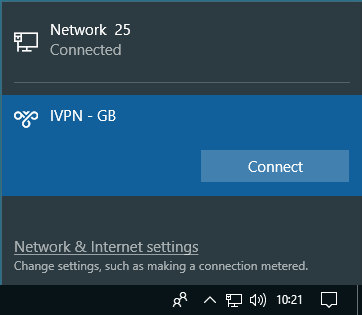
-
After a few seconds the network applet should indicate that you are connected to the VPN server.
DNS may leak with this manual connection. Check out our guide on setting DNS manually.
Disabling IPv6 may be another way to further tighten up your system.
Suggest an edit on GitHub.