WireGuard NetworkManager setup guide
WireGuard support was added to NetworkManager in v1.16. This guide was created with NetworkManager v1.20.4-1 on Manjaro with KDE and verified on openSUSE Tumbleweed with KDE with NetworkManager v1.18.2-1.1. Generally, KDE’s implementation of NetworkManager supports WireGuard, though other desktop environments might not.
Configure your environment
-
Install WireGuard for your distribution.
Install additional packages for Debian/Ubuntu/Mint:
$ sudo apt install resolvconf curl -
Generate your private and public keys and store them in a safe place.
$ cd ~
$ mkdir wireguard
$ cd wireguard
$ wg genkey | tee privatekey | wg pubkey > publickey
$ chmod 600 privatekey
$ cat privatekey
abcdefghijklmnopqrstuvwxyz0123456789=
$ cat publickey
9876543210zyxwvutsrqponmlkjihgfedcba=
Note: The keys above are examples only.
Setup WireGuard to use IVPN
-
Log in to the IVPN Account Area.
-
From the
Accountpage, click theWireGuardtab. Go toWireGuard Key Managementlocated underTools. Click theAdd New Keybutton. Copy the contents of the public key file and paste them into thePublic Key:field. Add a comment, likeLinuxif you prefer, and click theAdd Keybutton.Be sure to copy the PUBLIC key and not the PRIVATE key. The PRIVATE key must always be kept a carefully guarded secret. -
Make note of the
IP Addressbeside your newly added public key on the WireGuard tab in the Account Area. This is the IP address your computer system will have on our internal network. It will be in the form172.x.y.z. -
Open the NetworkManager
Configure network connectionswindow. This is often available via an icon in the system tray near the clock, though each Linux distribution may be different. -
Click the
+to add a new connection. SelectWireGuardfrom the list, then click theCreatebutton. -
The
Connection name:field should reflect the server location and will be used as the network interface name. Alphanumeric characters and dashes may be good choices, which easily reflect the names of our servers (ie. ca1, de1, us-ga1).Enter your private key in the
Private Key:field on theWireGuard Interfacetab.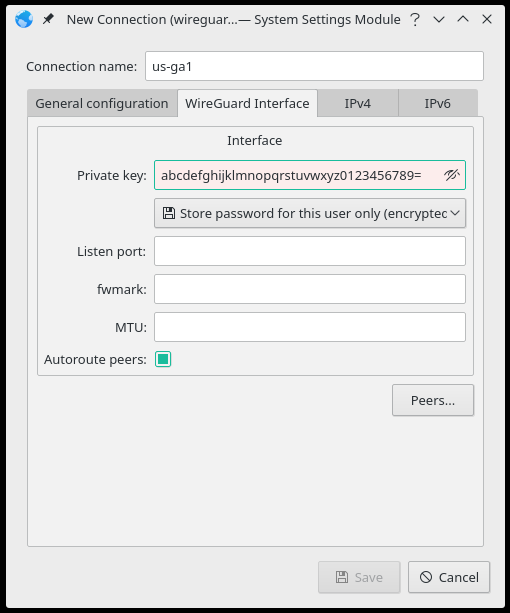
-
Click the
Peers...button on theWireGuard Interfacetab and add the following:Public key: = WireGuard server public key available on the WireGuard Server List page in the Account Area
Allowed IPs: = 0.0.0.0/0
Endpoint address: = WireGuard server address available on the WireGuard Server List page in the Account Area
Endpoint port: = choose one of the ports we offer: 53, 80, 443, 1194, 2049, 2050, 30587, 41893, 48574, 58237Click
OK.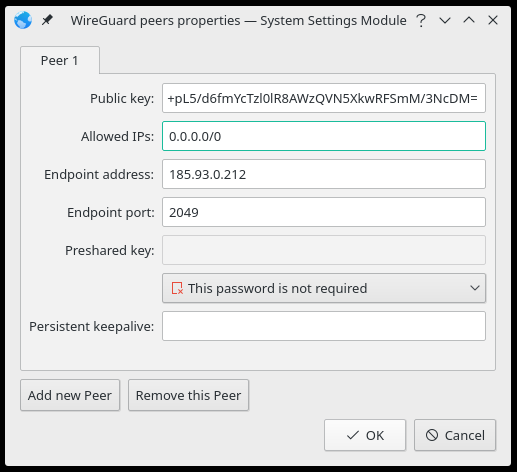
-
On the IPv4 tab, set
Method:to Manual. The DNS server can be one of three options:172.16.0.1 = regular DNS with no blocking
10.0.254.2 = standard AntiTracker to block advertising and malware domains
10.0.254.3 = Hardcore Mode AntiTracker to also block Google and Facebook domainsClick the
+ Addbutton to add the IP address we have assigned your account in step 3 above. The Netmask is 255.255.255.255 and the Gateway is 0.0.0.0.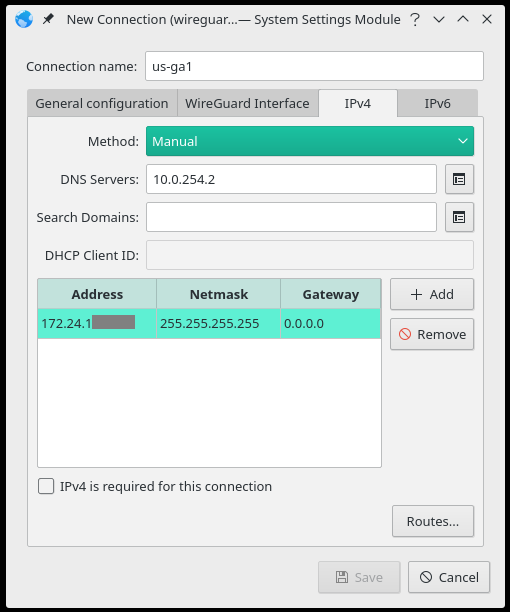
-
On the IPv6 tab, set
Method:to Ignored. -
Click the
Savebutton.
Connecting and Disconnecting
-
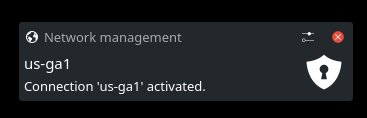
To connect, click the
NetworkManagericon in the system tray and clickConnectbeside the newly created WireGuard connection. -
Check the connection status.
-
Check https://www.dnsleaktest.com to verify the IP address your traffic is coming from (and that there are no leaks).
-
To disconnect, click the
NetworkManagericon in the system tray and click theDisconnectbutton next to the active connection.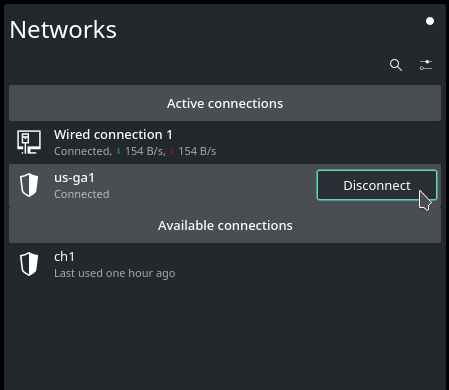
Suggest an edit on GitHub.